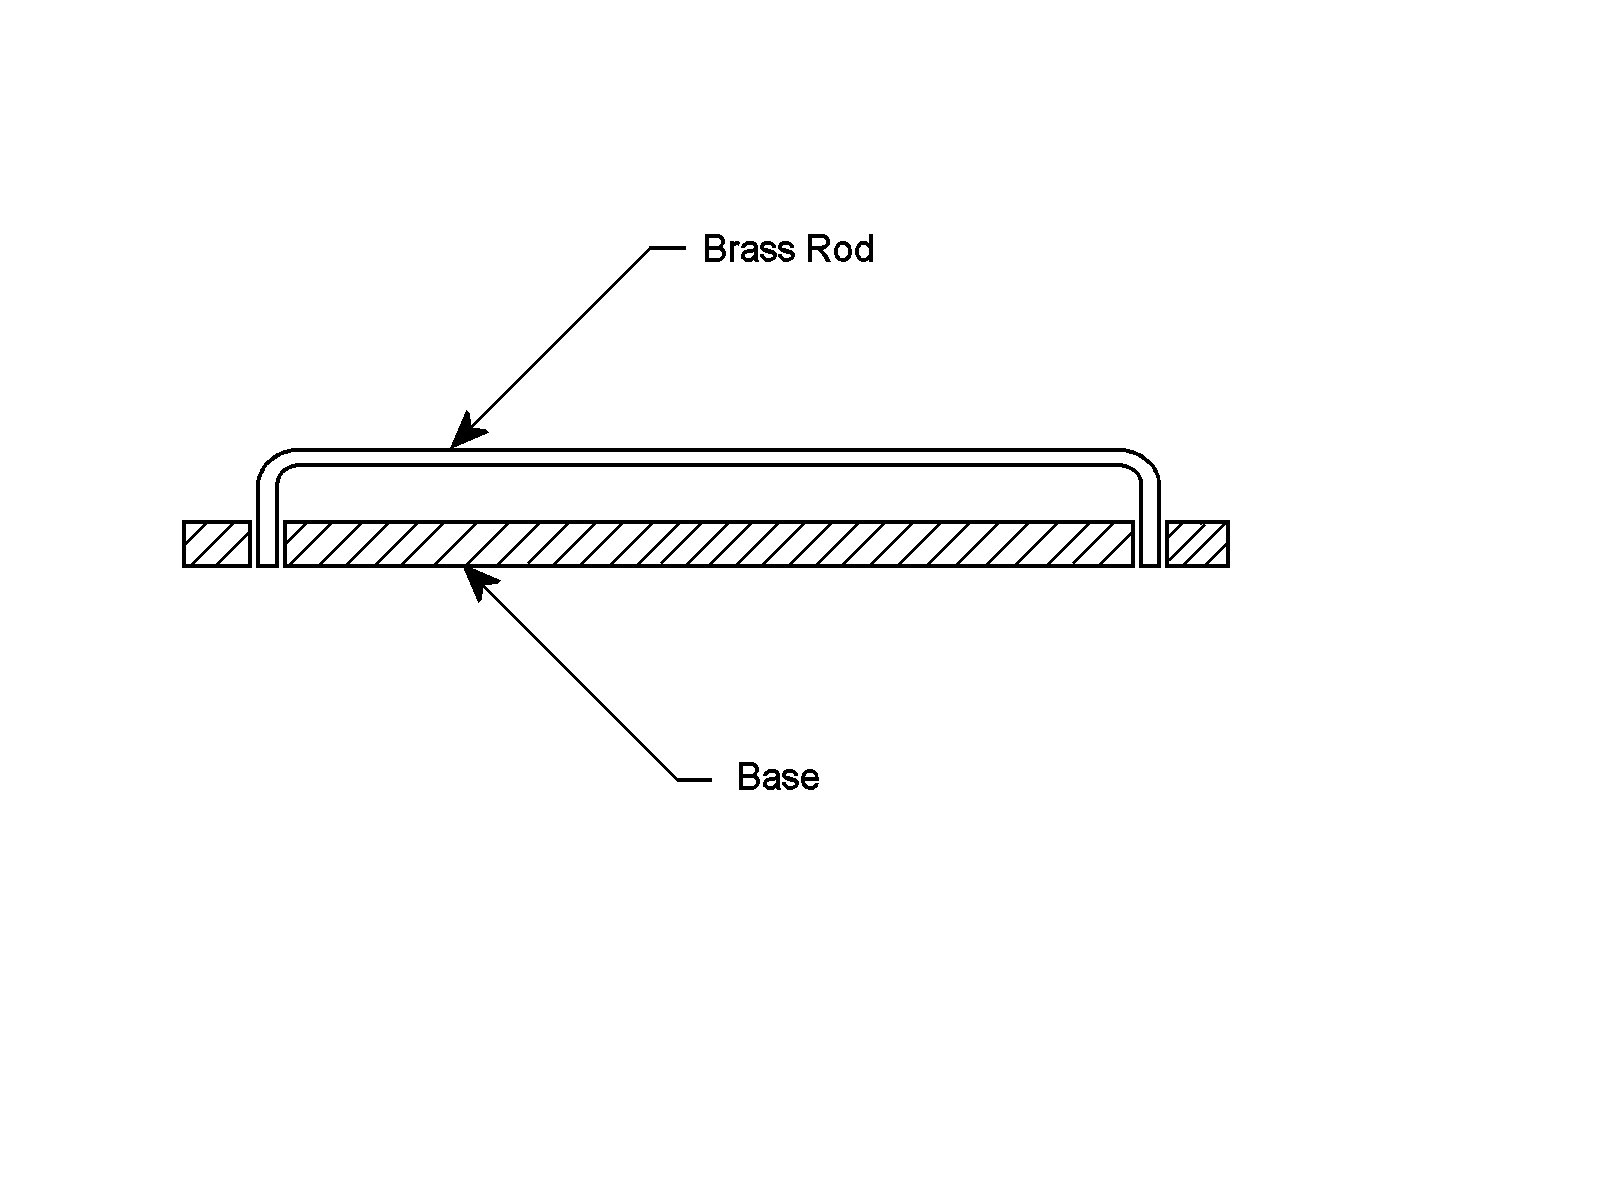
A 1/16"
diameter brass rod was bent to the shape of a curtain rod as shown on
the drawing. Then holes were drilled in a 1/8' deep by 3/16" wide strip
of wood so that the curtain rod would be held firm but remain
removable for curtain changing or washing.
This wood strip was then painted and glued to the dollhouse window
frame using household "Goop". The curtain was then slipped onto the
curtain rod and the rod placed in the holes.
|
 |
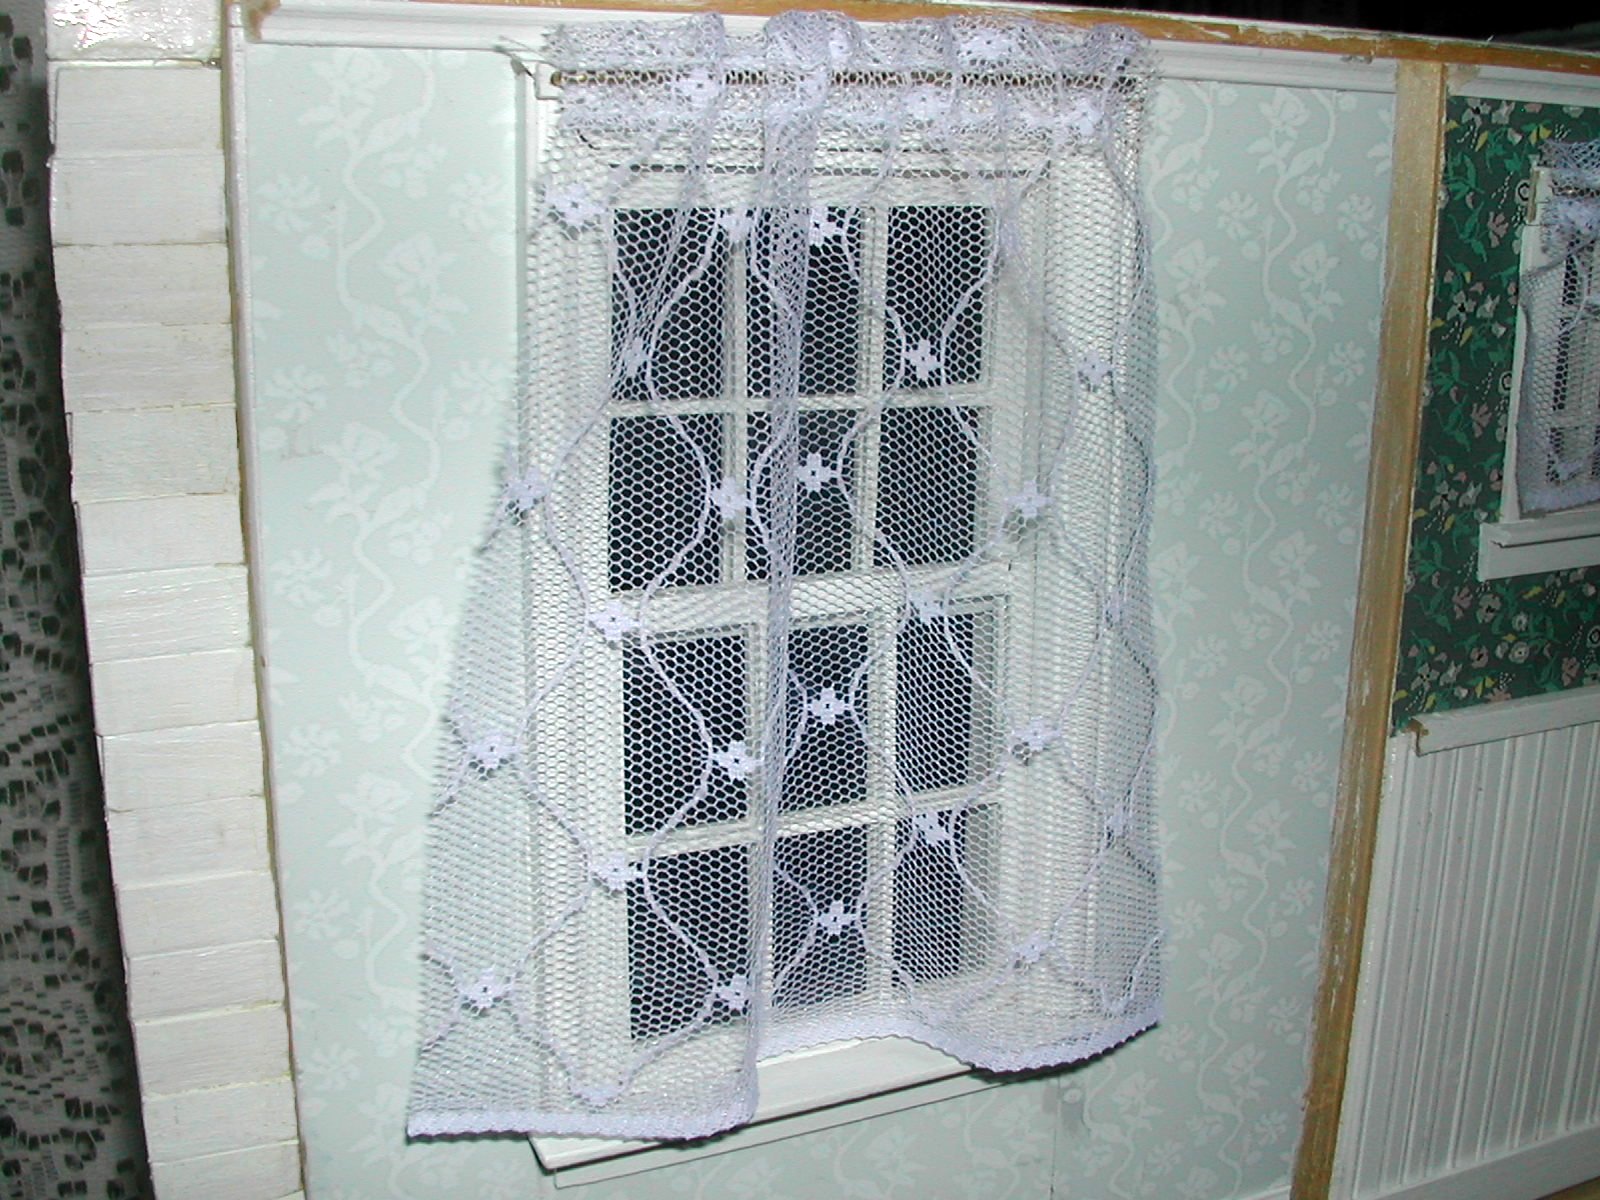
We
found this method far superior to the way most dollhouse curtains
are hung because it is much more in scale and closer to the way rods
look in real life. It also eliminates the need for out of scale eye
screws to hold the rods in place. That method would have interfered
with the opening of the interior shutters.
|
 |
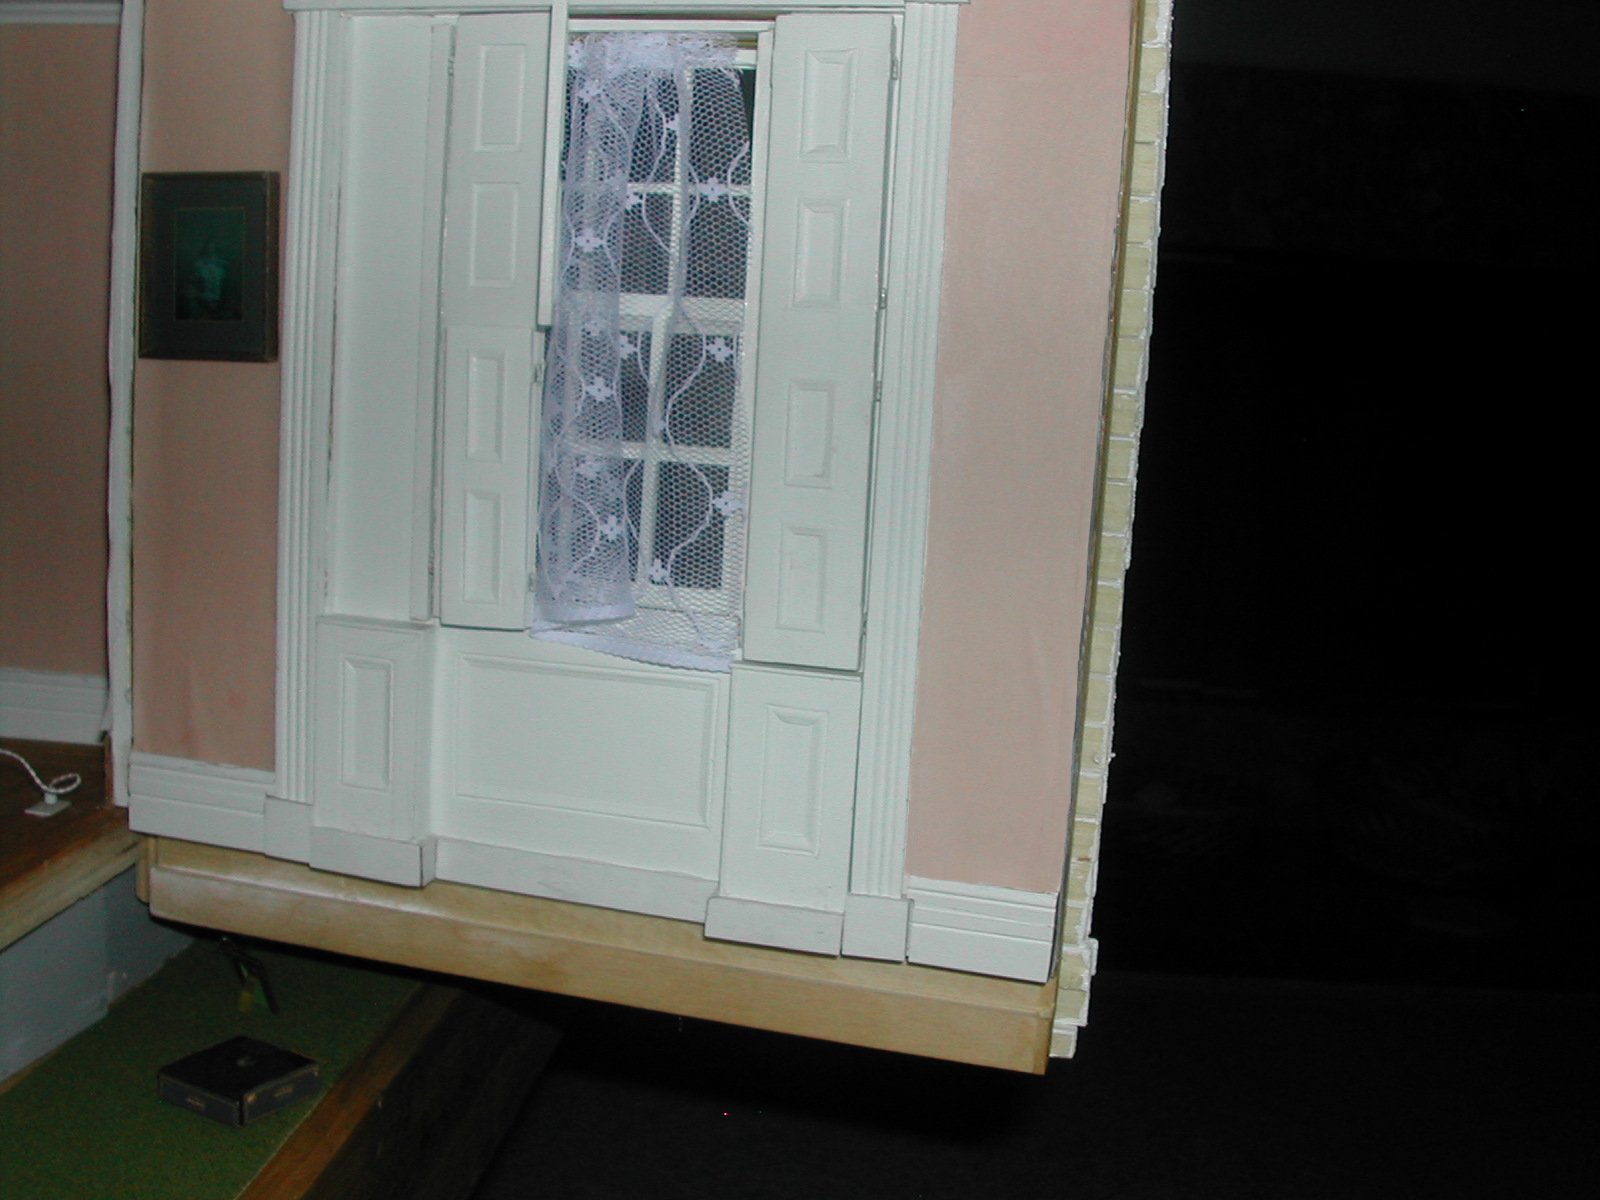
As
you can see, this method works for the shuttered windows as
well as the regular windows.
|
 |
As
in the real house, the pattern of the lace on the first floor
curtains differs from the pattern used on the second floor and the
kitchen has a distinct pattern all it's own.
|
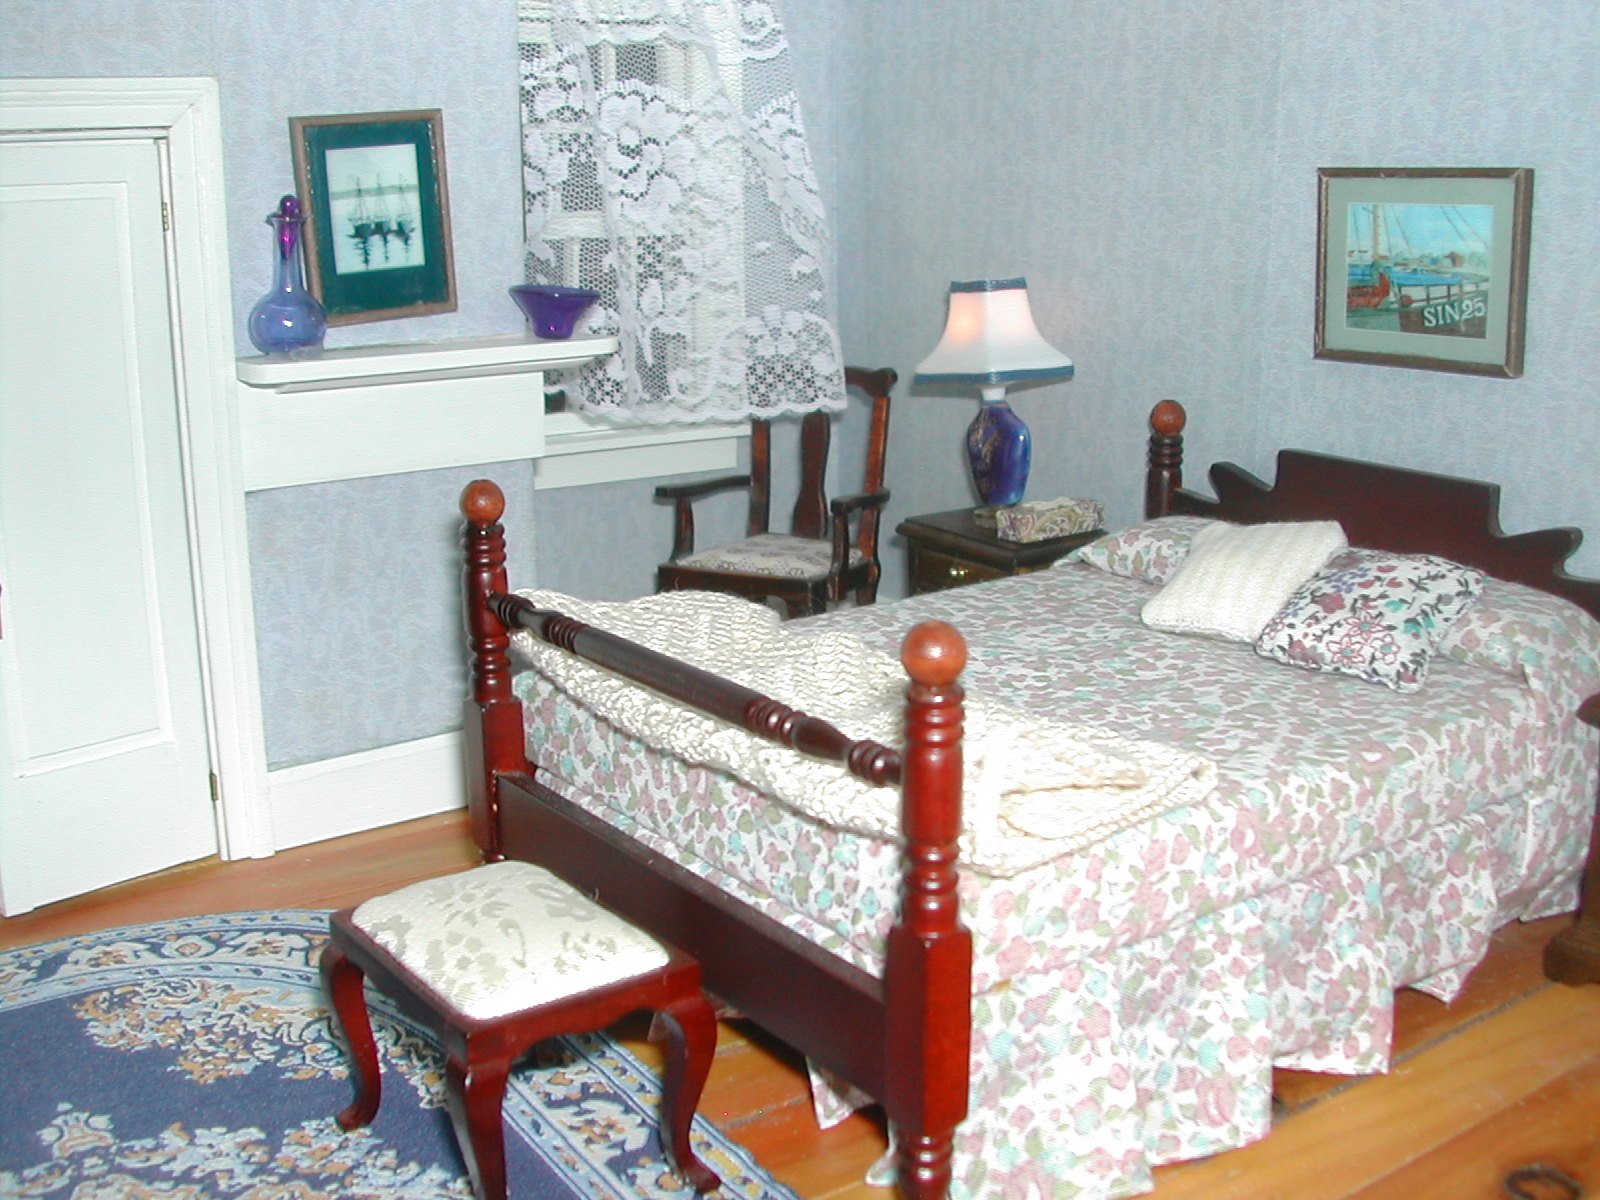 |
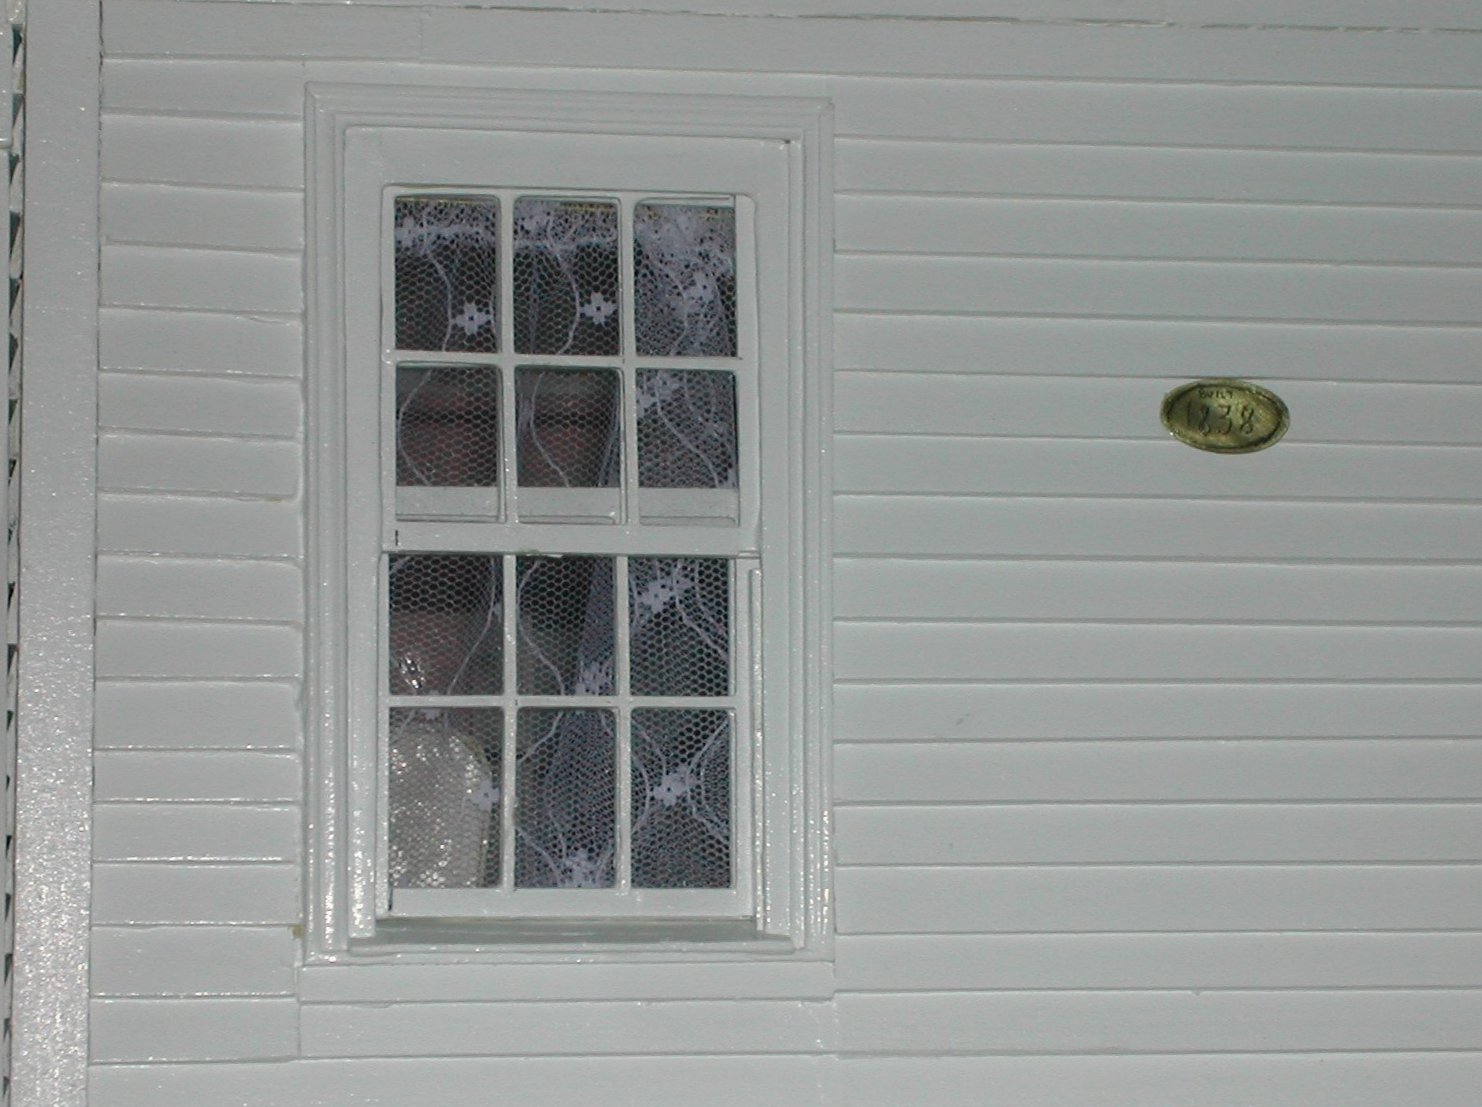
The
lace looks equally nice from the outside making a lovely pattern on
the windows. By using lace, you do not block light yet you provide
privacy, which explains the need for the busier pattern on the
bedroom windows. In the real house, there are no blinds or window
shades except for two cloth Roman blinds on the two west facing
kitchen windows where the setting winter sun sometimes causes annoying
streaks of light while meals are being prepared. Those blinds are
lowered only when needed and for only a very short length of
time.
|
 |