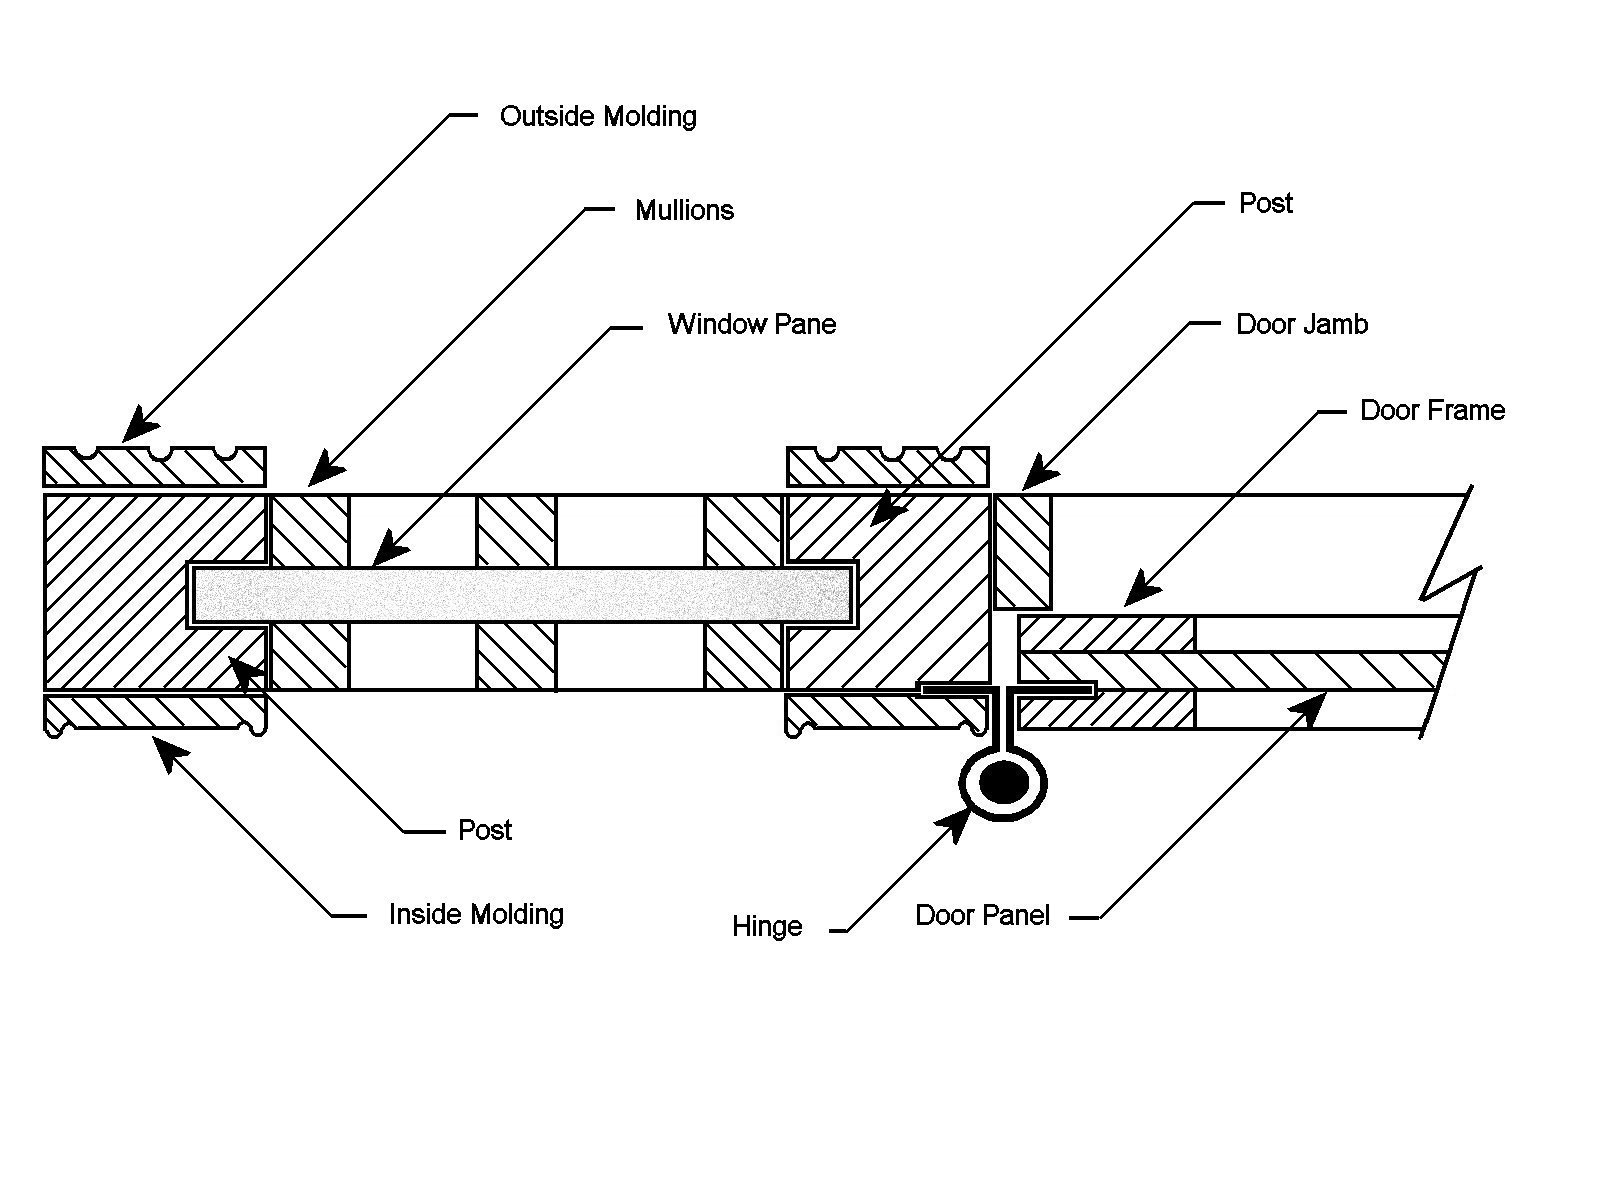
| A
cross section of the front door unit with its two side lights is
shown on the right. The
vertical
posts have a slot milled to accept the window pane and bottom panel.
The
front door is much thicker than the other interior doors and therefore
was
not made with tongue and groove construction but rather from a panel
cut to the full size of the door. The door frame strips and door
moldings were then glued to the panel with the hinge as shown in the
sketch. |
 |
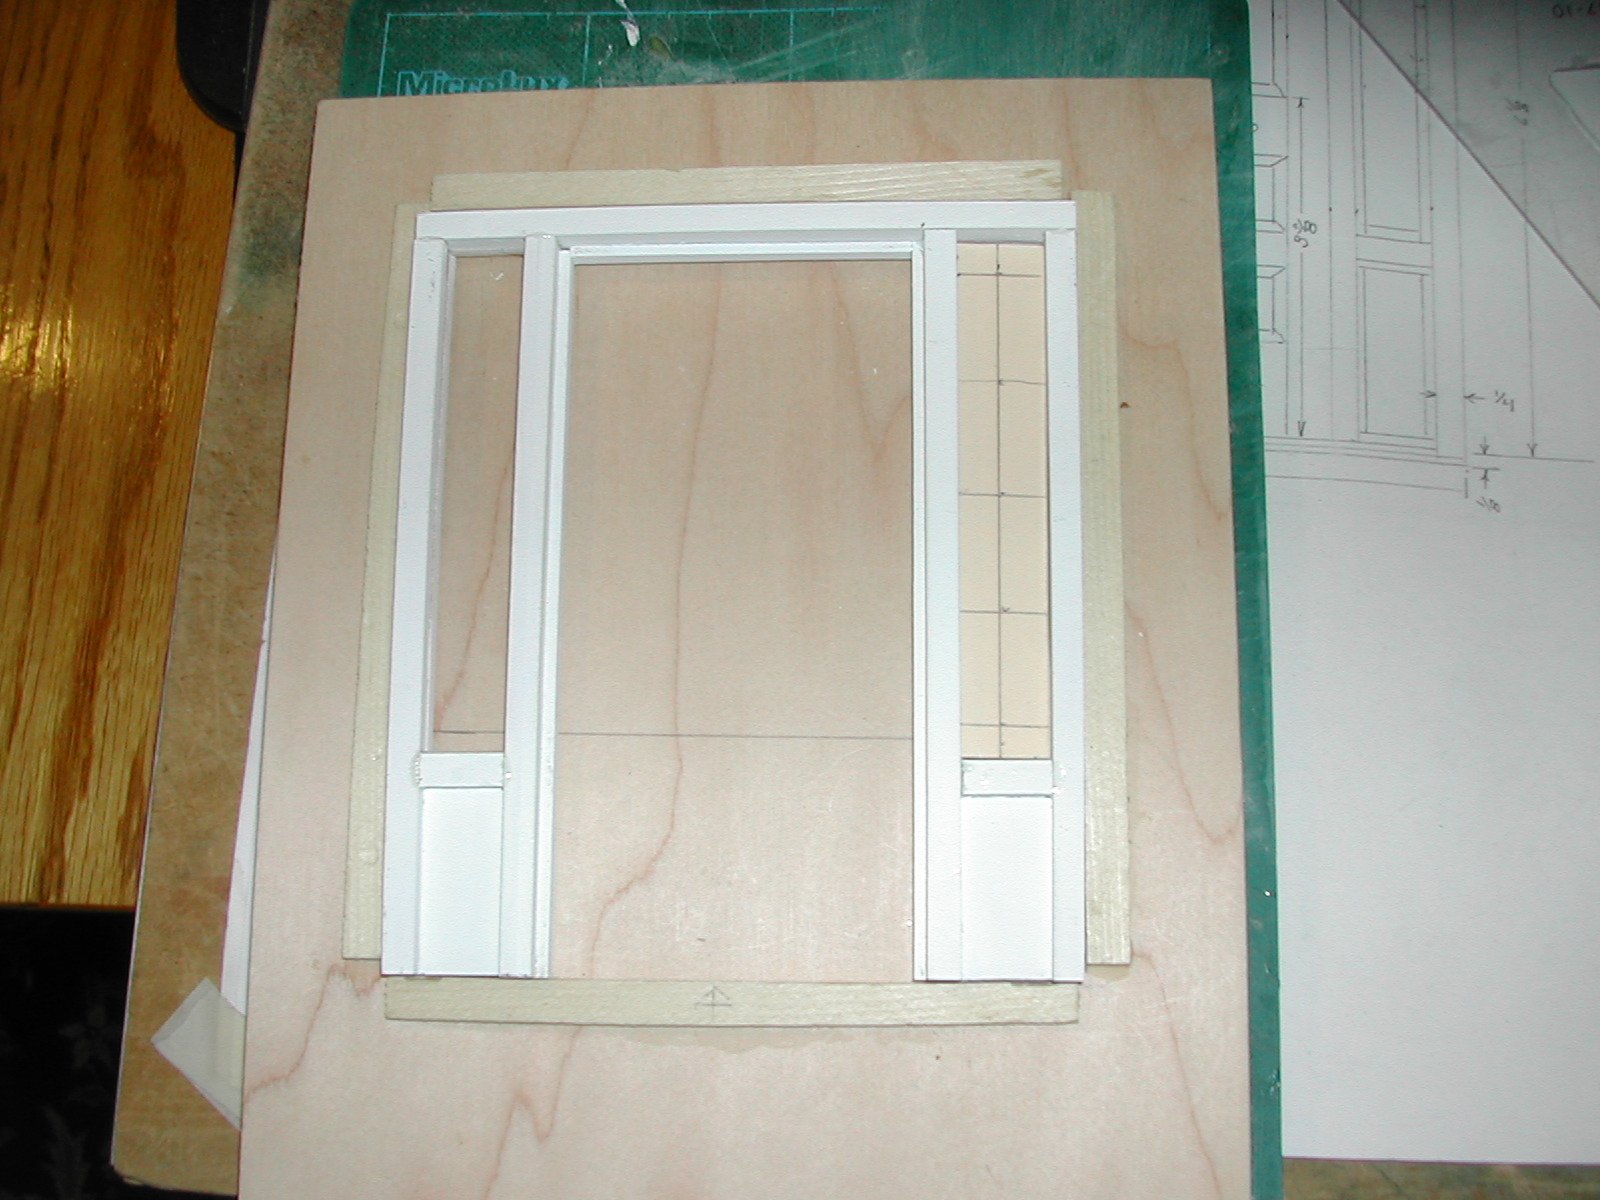
| The
front door unit, including the side windows, was constructed in a jig
that just fit the door cutout. The vertical strips and the top strip
were cut from 3/8 " maple. This strip was then slotted so that the side
windows could be slid into place as well as the bottom panels. Extra
strips were placed on the inside of the door frame to create the door
jamb. The photograph on the right shows the painted frame in place with the windows and bottom panel in their slots ready for the mullions to be added. This frame was assembled with 5 minute epoxy. In the right hand window is the template for the placement of the mullions. |
 |
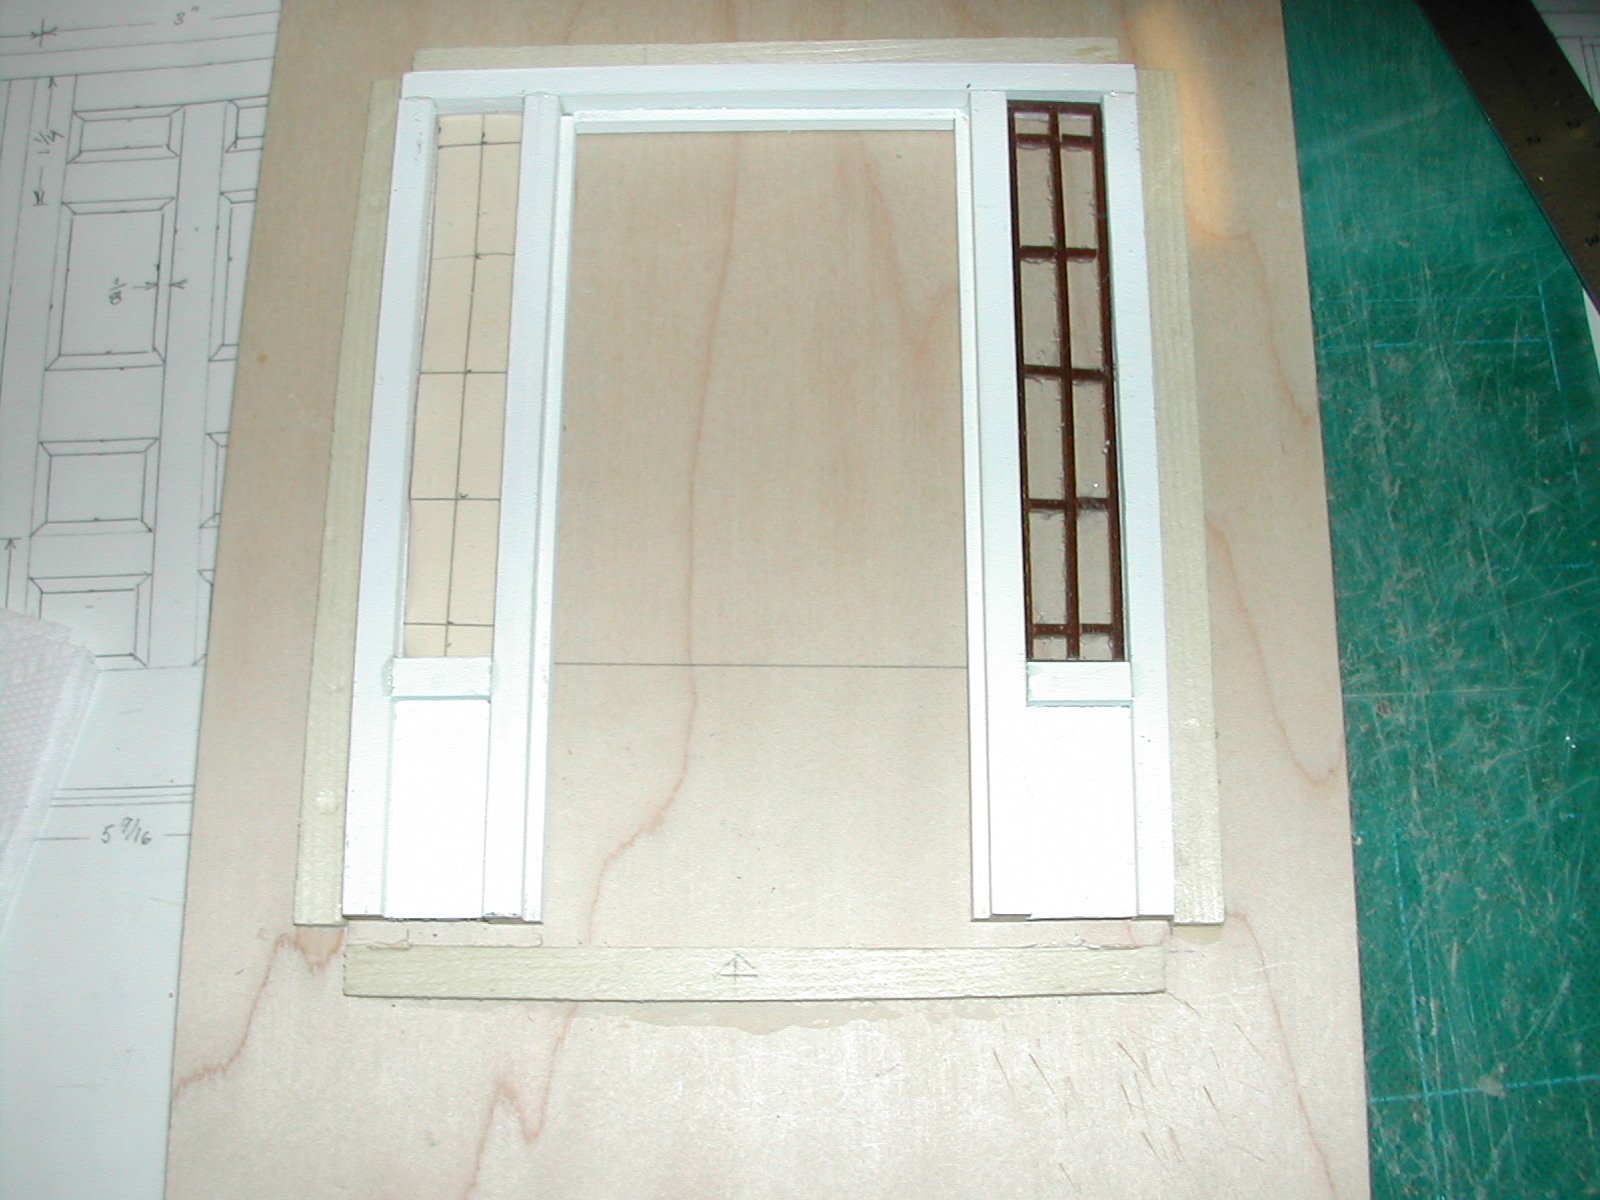
| This photograph shows the painted mullions in place. The inside mullions are stained a dark red/brown and the outside mullions are painted white. The mullions were glued to the plastic windows using "Goop". |
 |
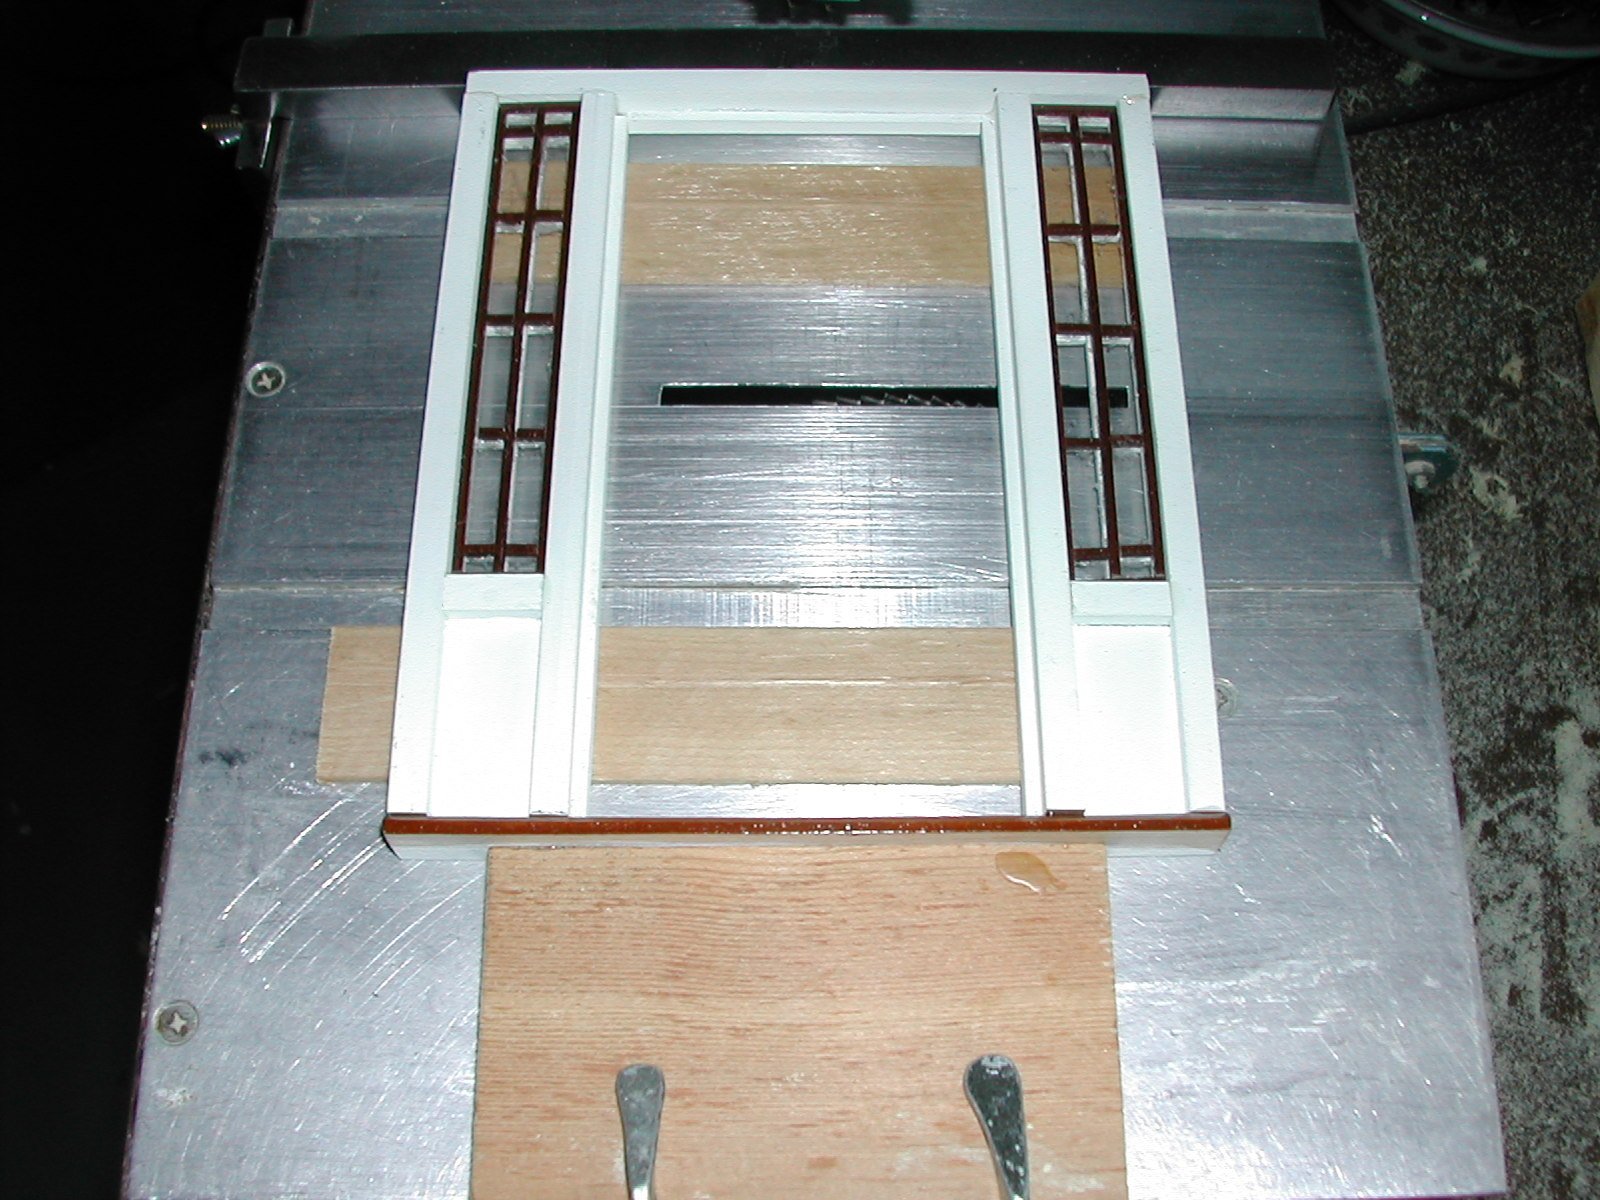
| Here you see
the completed door unit frame. The door itself is not
yet in place. The
threshold was glued with 5 minute epoxy and clamped in place as shown,
waiting for the epoxy to set. |
 |
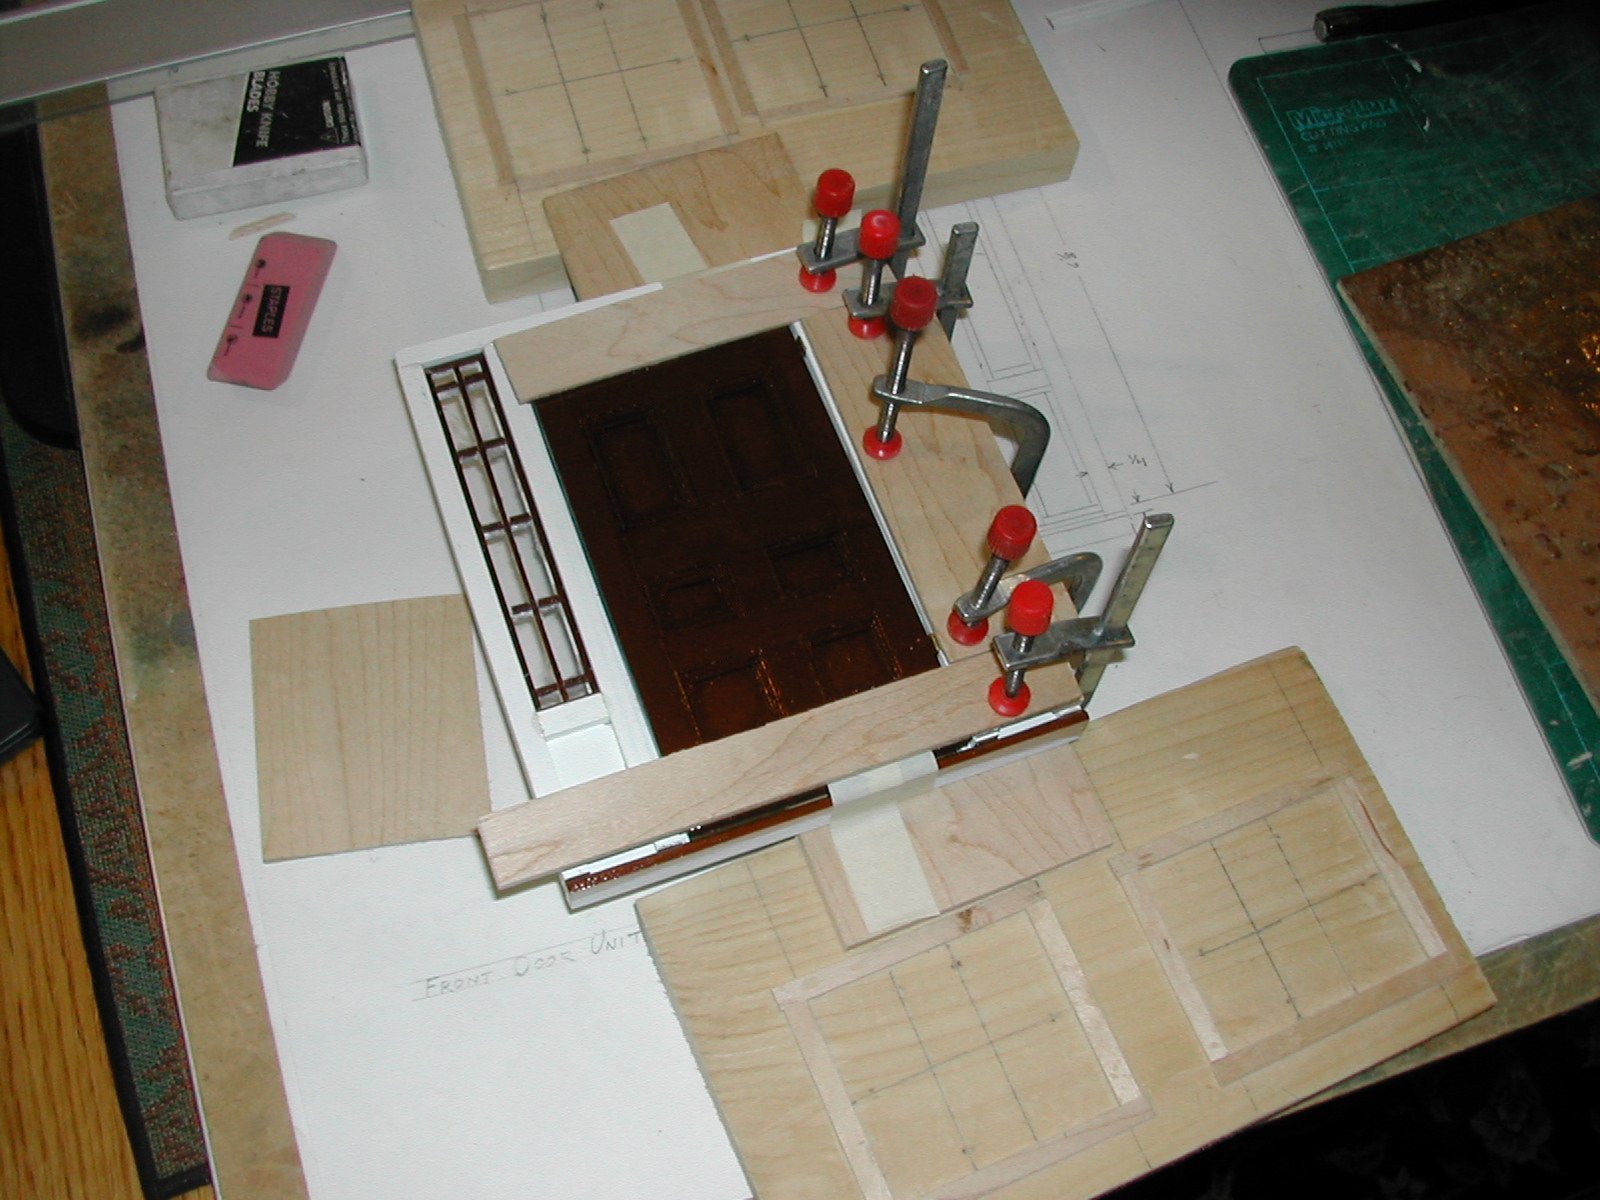
| This
photograph shows the door being attached to the door frame unit and
clamped in place while the epoxy sets. |
 |
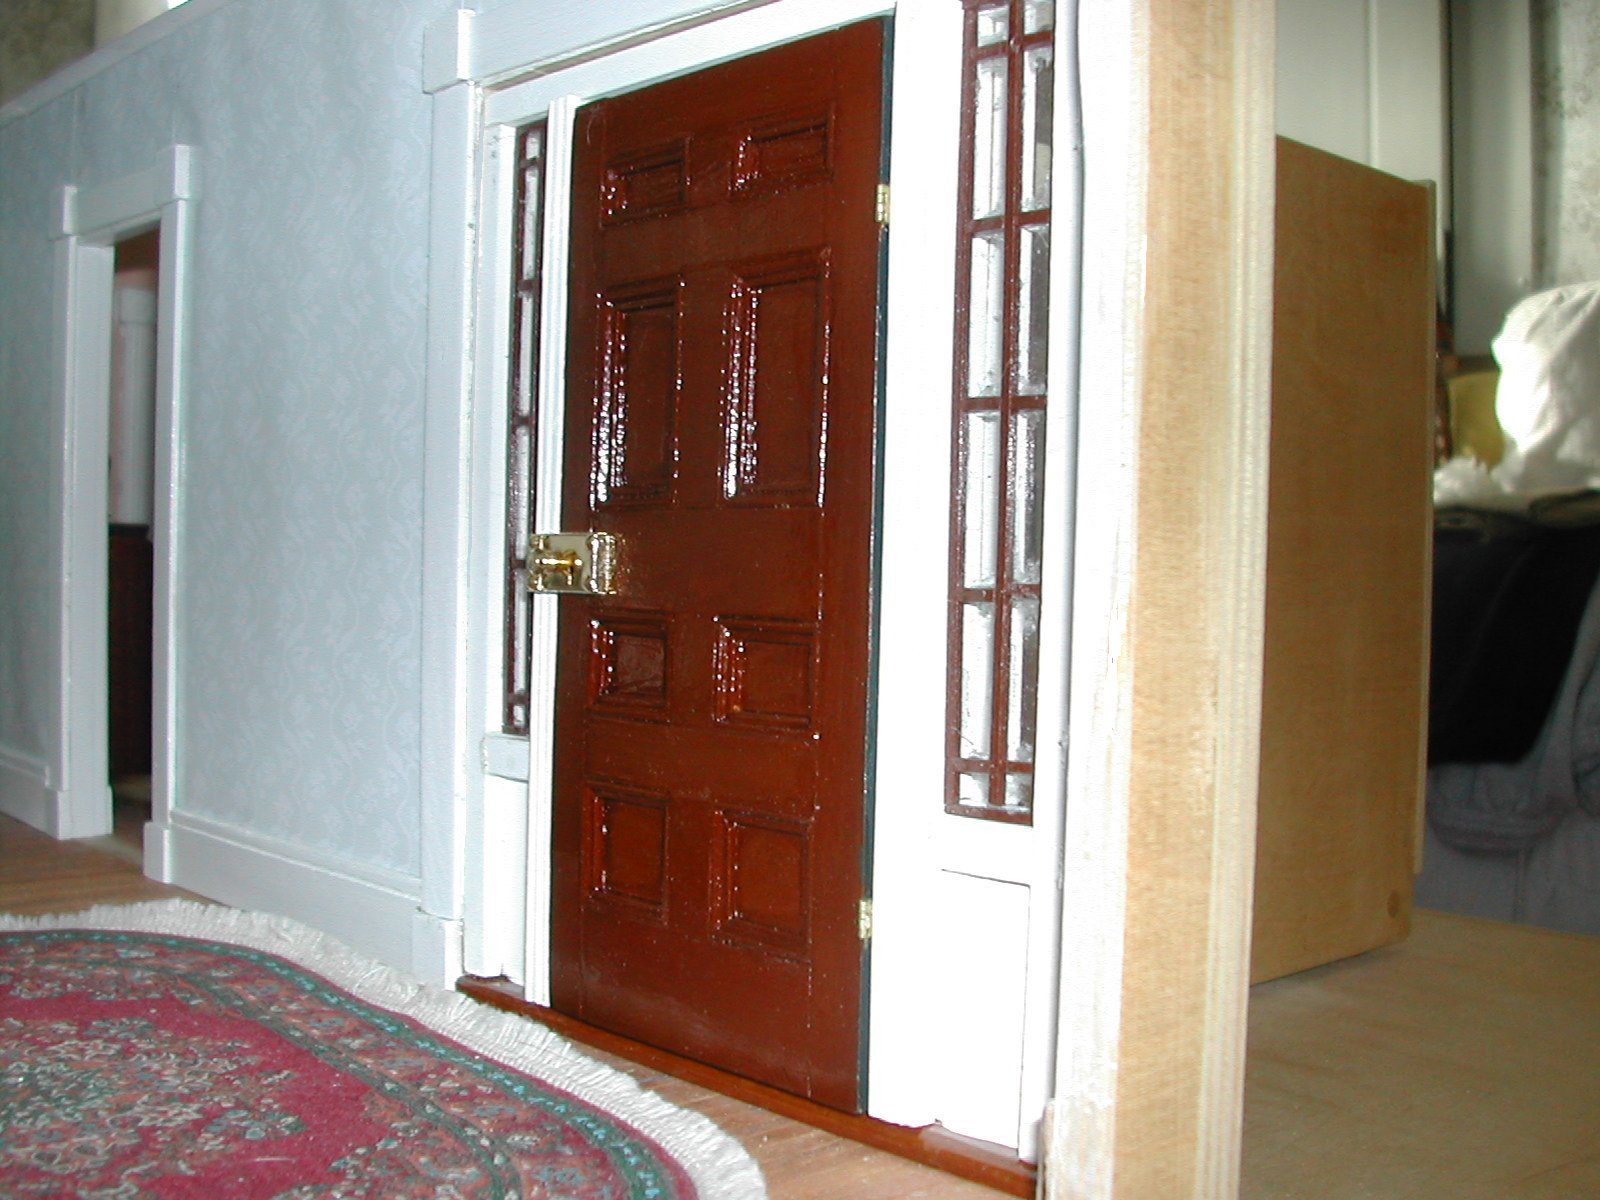
| The completed
front door unit is then glued in place with "Goop". The outside door
molding has been attached to the unit. However the complete Greek
Revival woodwork will wait until the exterior siding is in place. Note
that the
front door has the knocker, door knob and brass kick plate in place. |
 |
| While the
outside door unit and door are painted, the inside is stained a
dark brown. Also shown is the large rim lock which has a key. |
 |