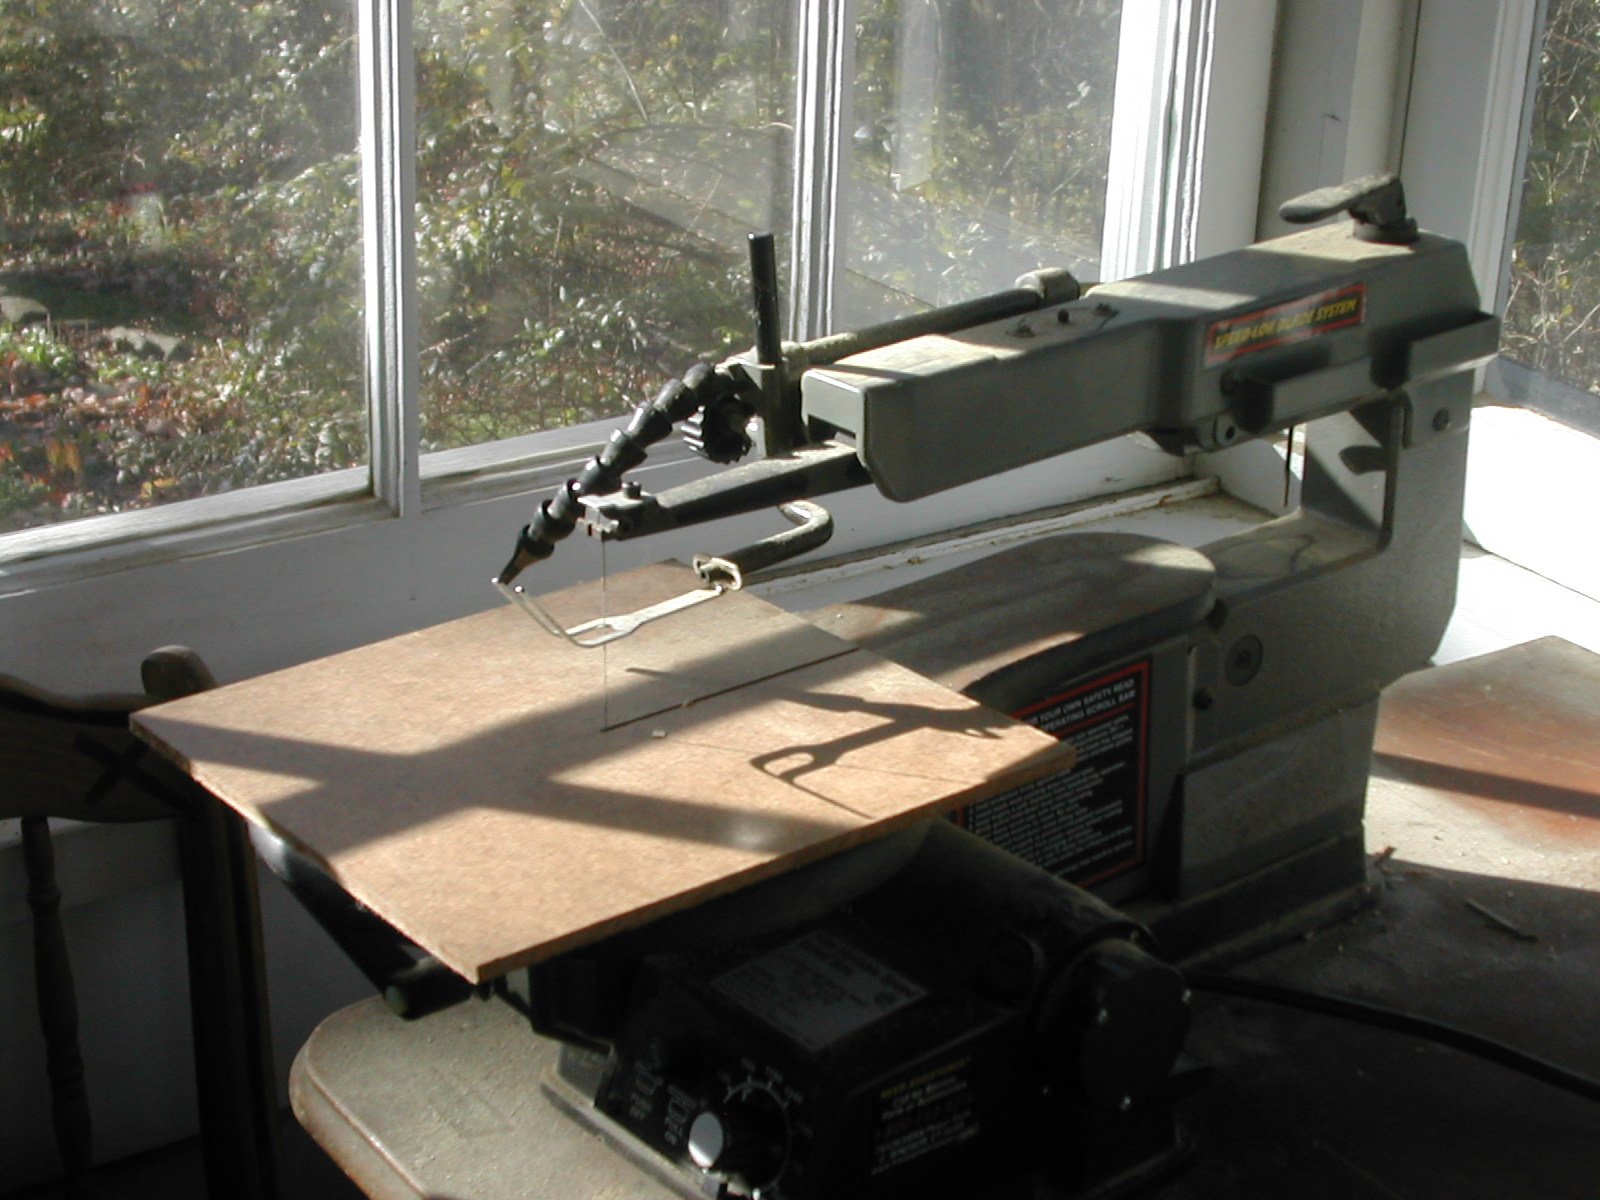
| A number of
bench tools were used to create the miniature. Among them were
an ACE Hardware 16" variable speed scroll saw, shown on the right. This
scroll saw was not made for making small model parts and had to be
modified. The slot where the saw blade passes through the table was
much too large and small parts could easily fall through. Therefore, a
flat board with a very fine slot was clamped to the table of the saw,
as
shown. |
 |
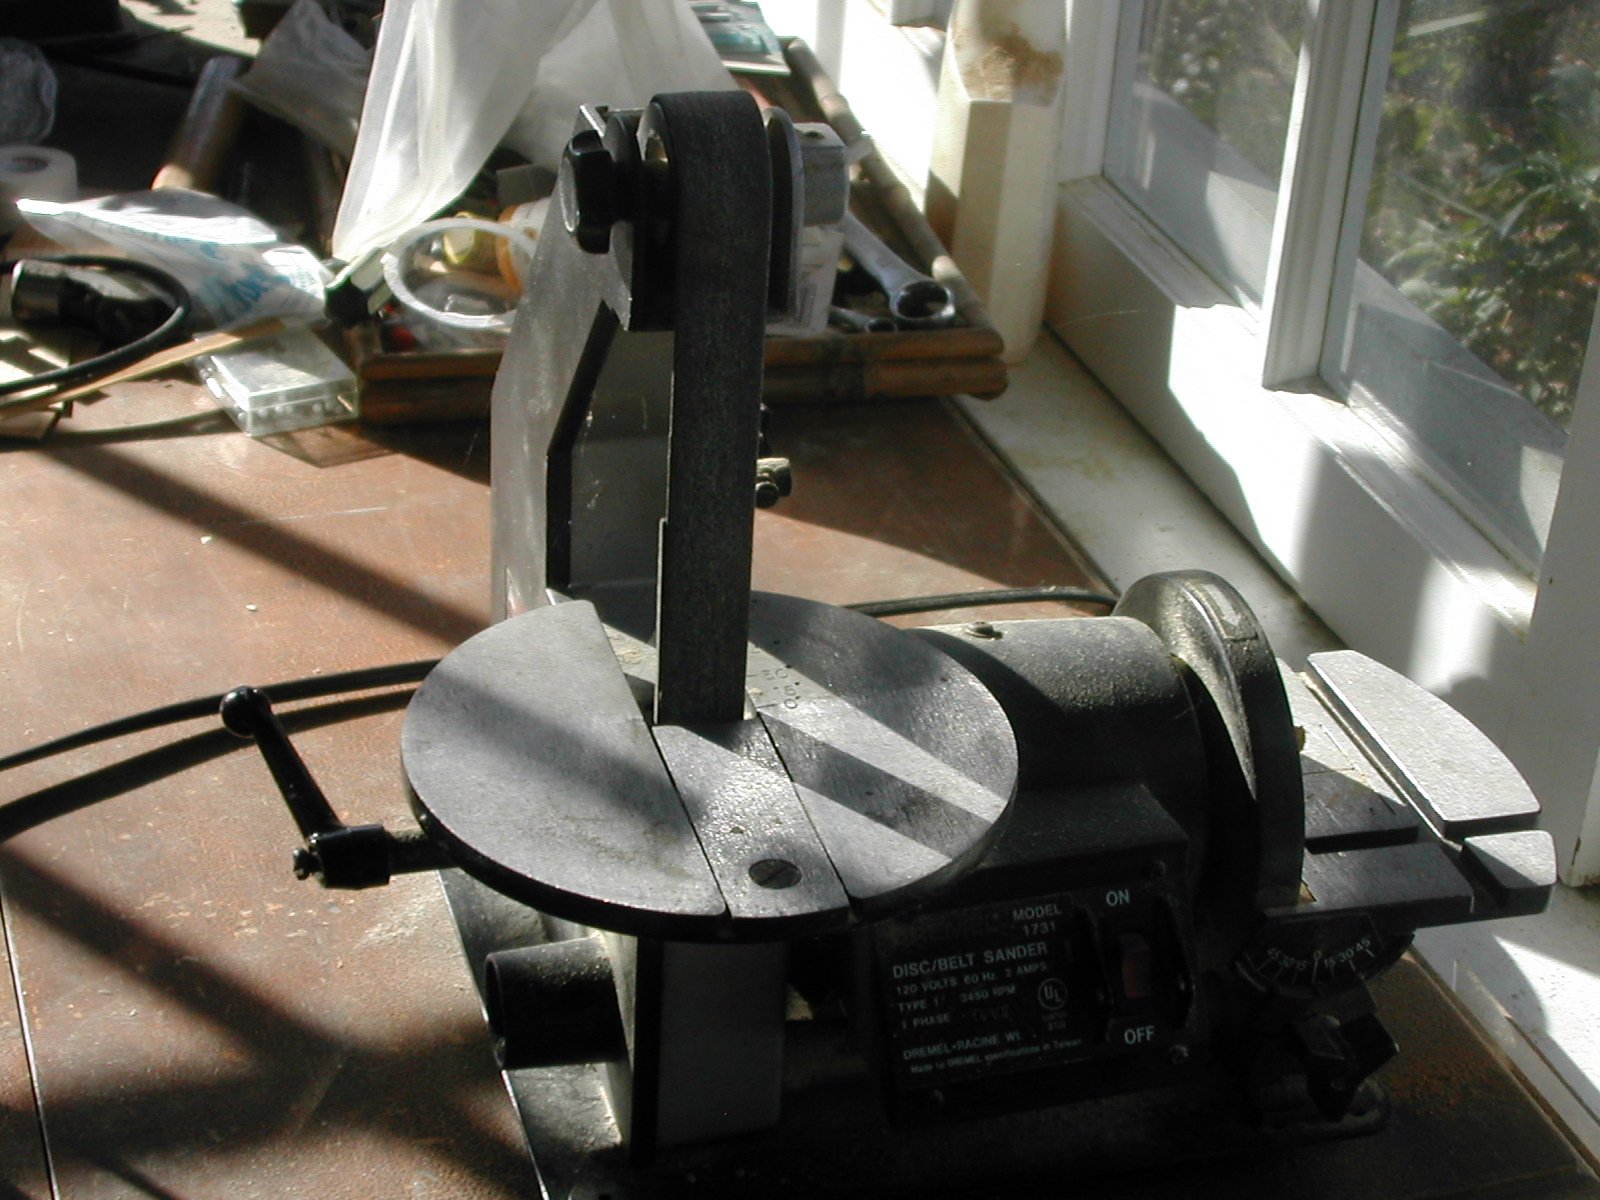
| A second
bench tool, a Dremel Model 1731 belt/disc sander, proved an
invaluable help. This model can be fitted with varying grades of sand
paper depending on the need. It was used primarily to
shape small parts to the exact tolerances needed. It
was also used to shape some of the molding to give it an ogee
crossection. |
 |
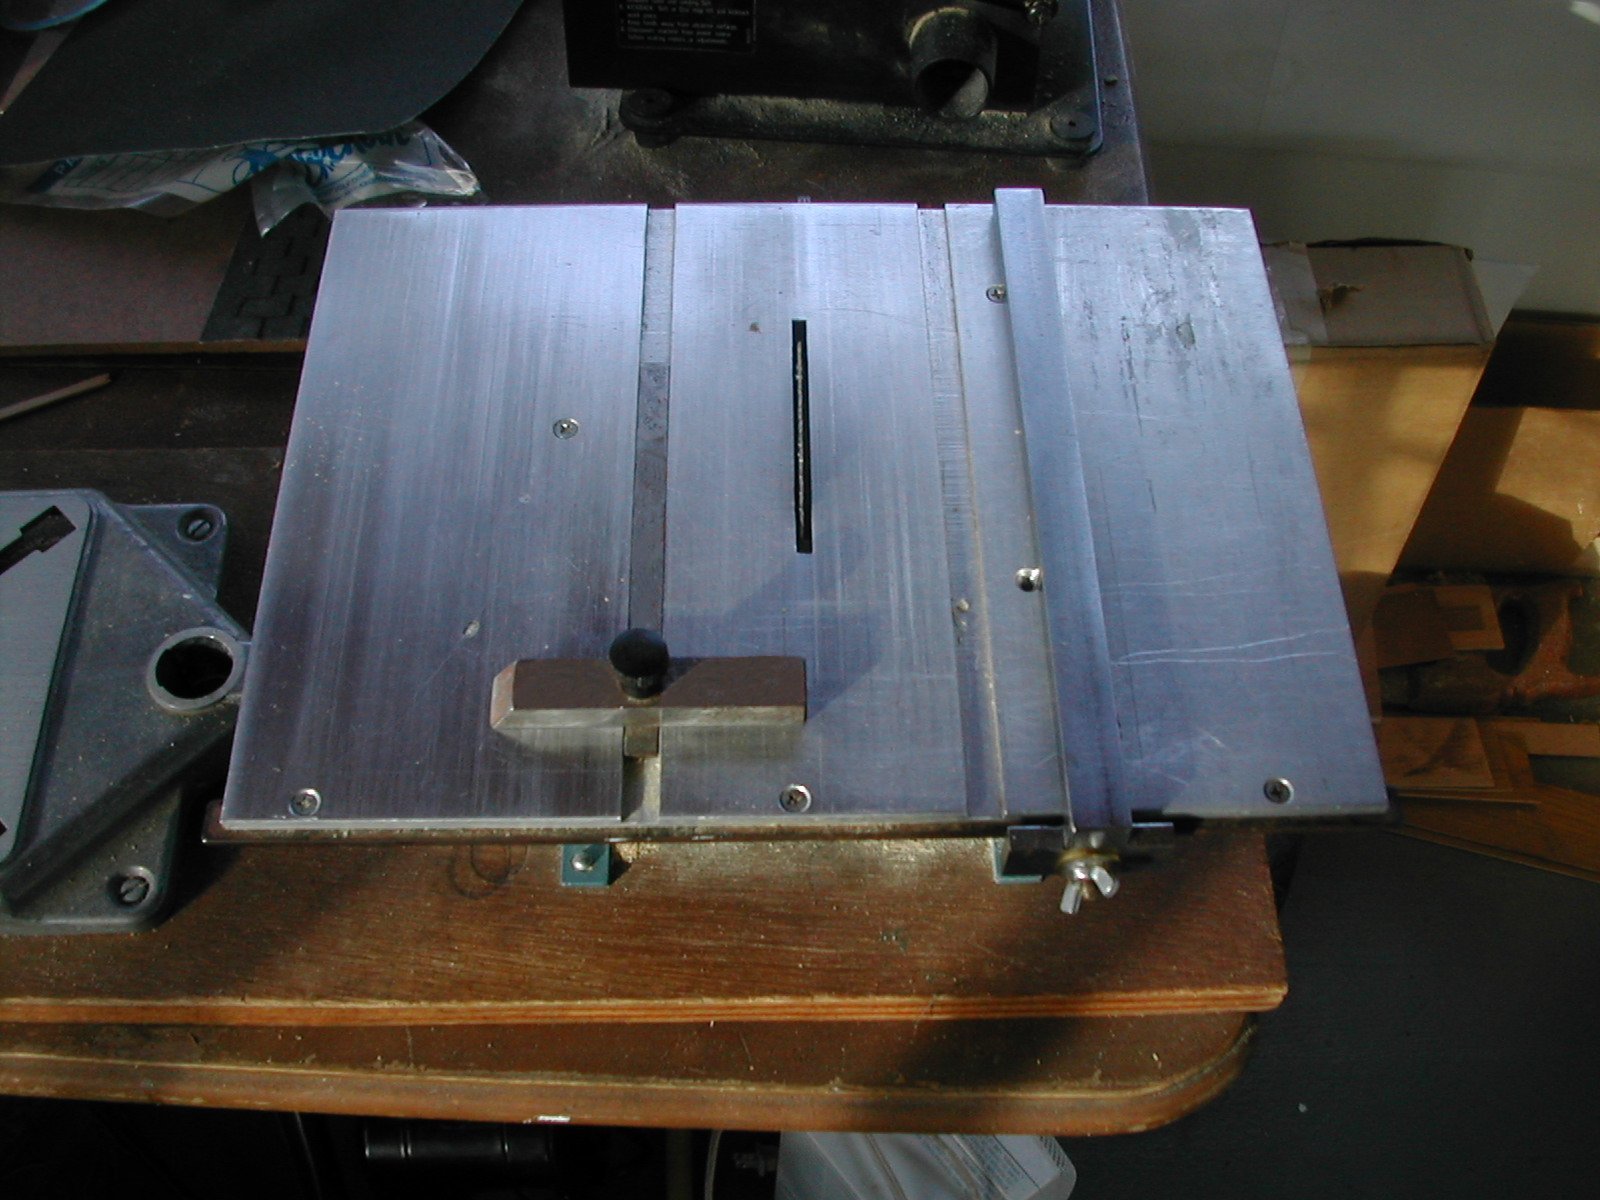
| A third
indispensable tool was a Jarmac table saw, seen to the right.
Since I
would be cutting hard wood like maple, I kept rotating three blades; a
replacement blade and a blade that would be always be in a machine shop
for sharpening and one being used. A problem soon developed with this
model table saw.
Since the fence was frequently moved, the screw that tightened the
fence soon wore out. This was replaced with a steel machine screw
welded to the back plate and tightened with a wing nut. |
 |
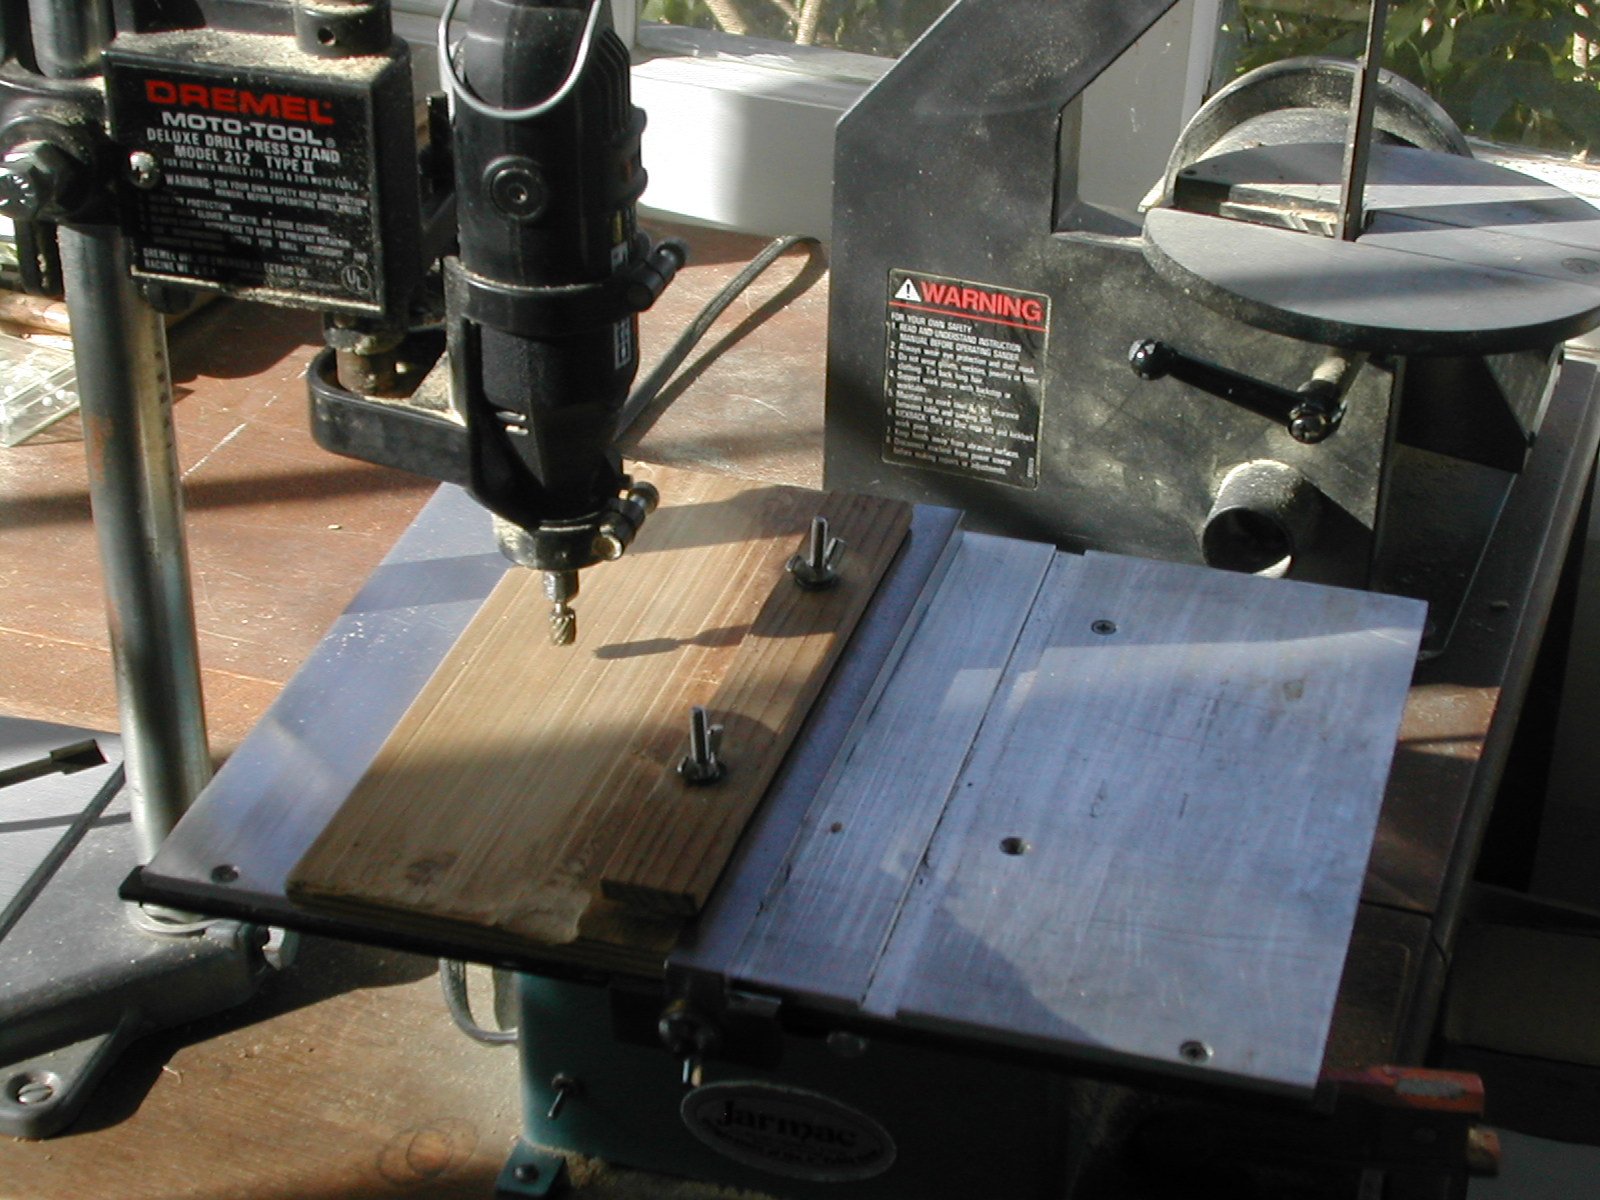
| A juri-rigged
milling machine was constructed for milling the numerous shapes of
molding and other parts. The Jarmac table saw was bolted to a plank of
wood
and used as the platform or flat table. A Dremmel Moto-Tool drill press
model 212, type II, was also bolted to the plank of wood in an
appropriate position and used to hold a Dremmel MultiPro variable speed
driver Model 395, type 5. The depth gage was removed and replaced with
steel bolts held by steel nuts. The nuts were adjusted to fix the
correct
height as seen in the photograph to the right. |
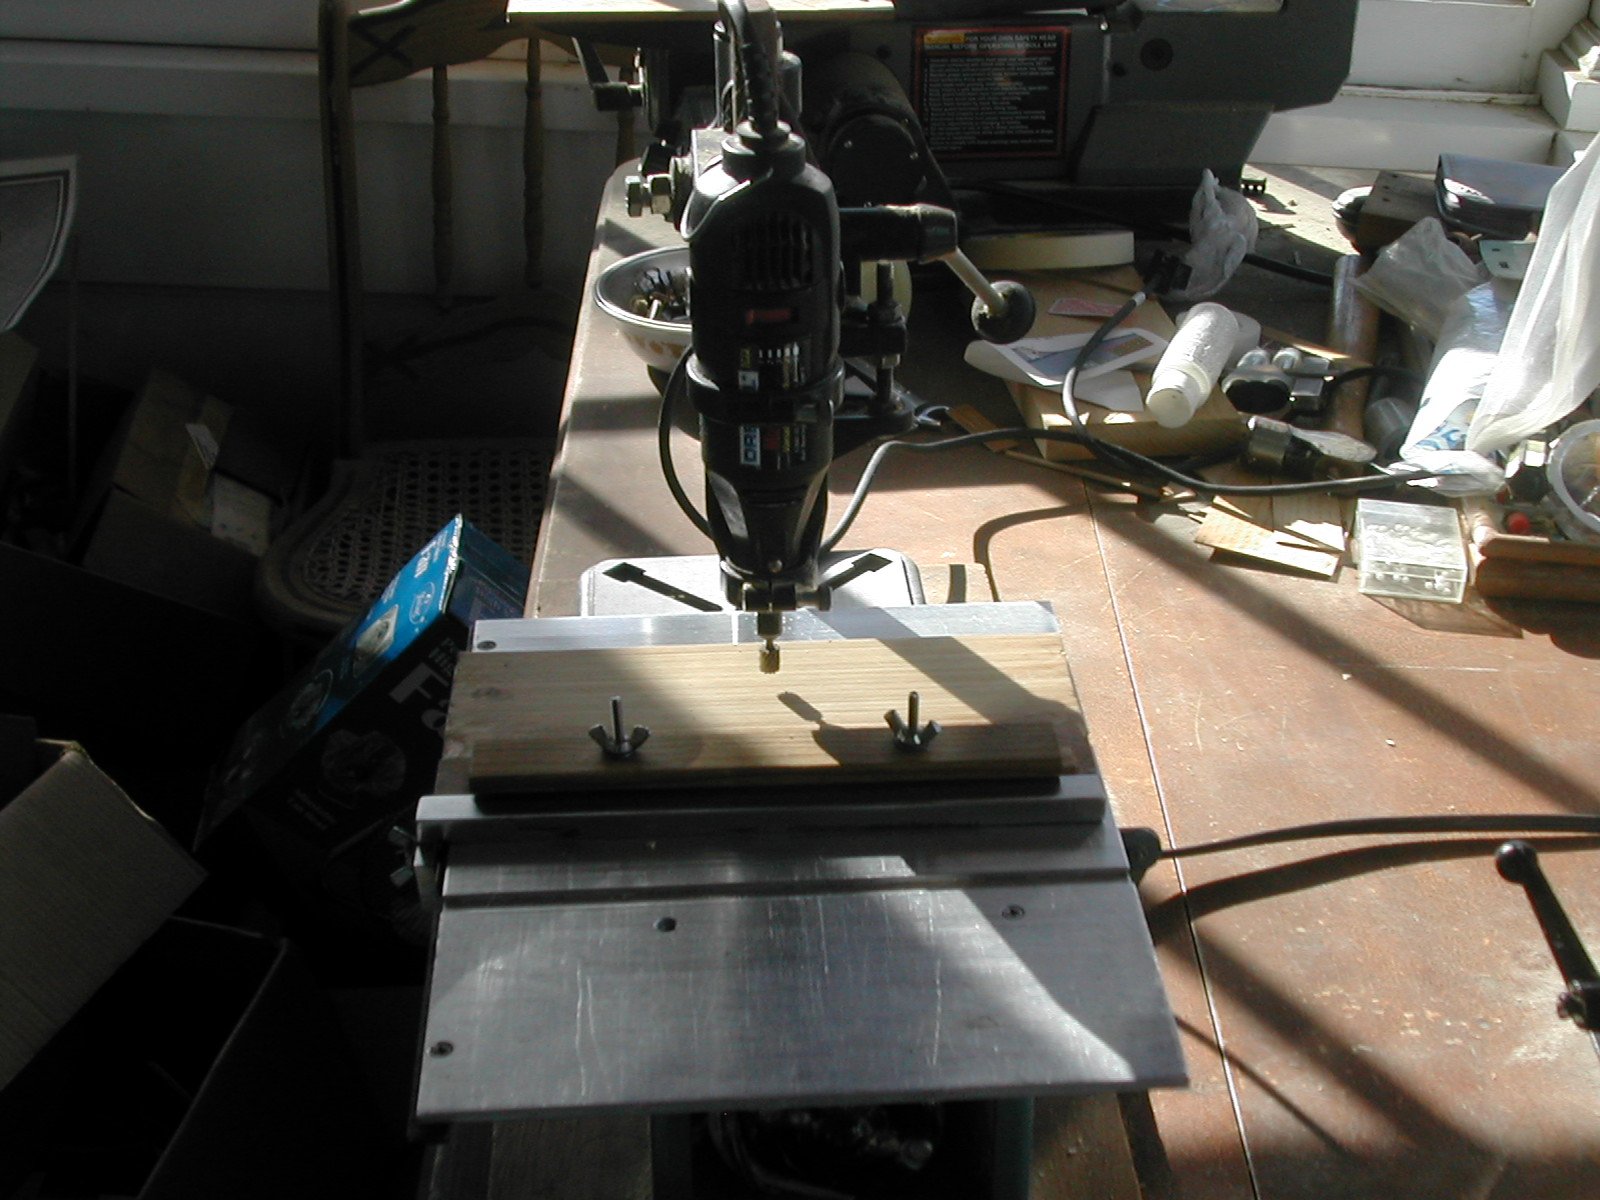 |
| In a
different view, shown in this photograph, you can see a
wooden movable platform with a clamp. The wood to be milled is clamped
to this platform and slid along the Jarmac fence which is used as a
guide to insure a straight cut. |
 |
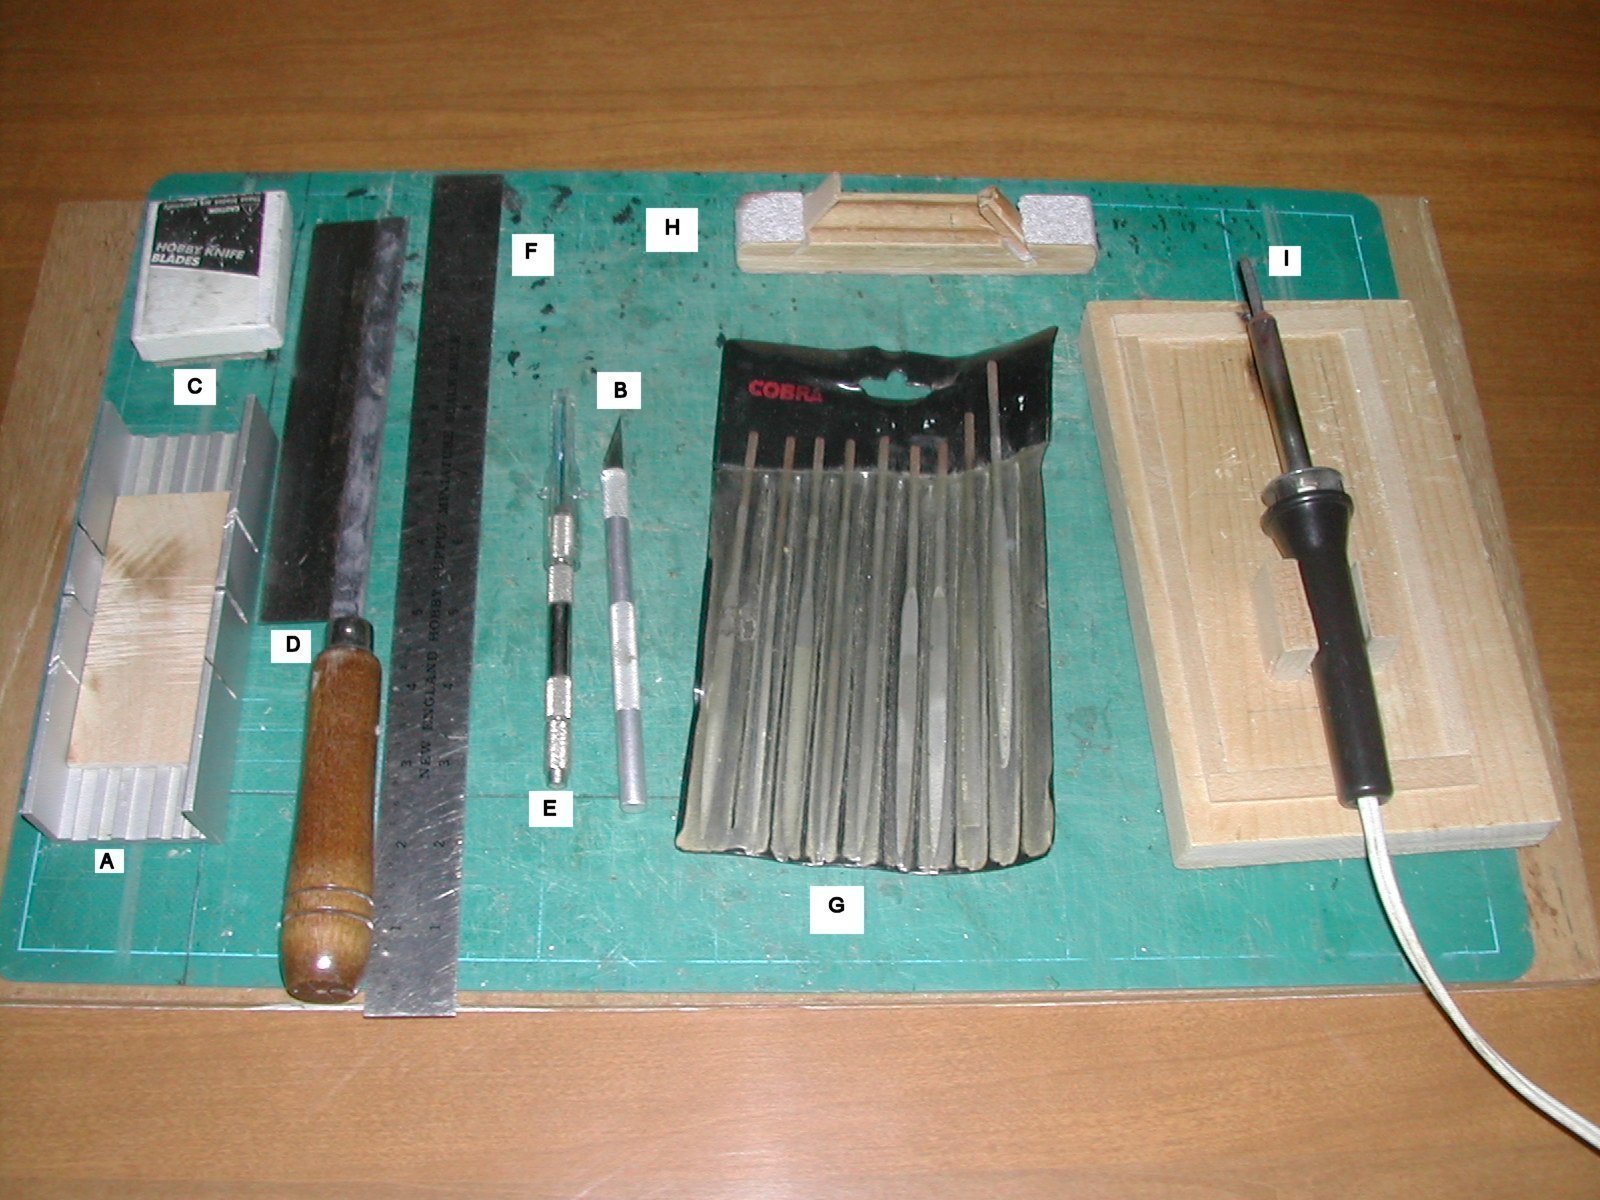
| Some of the
small hand tools used in the construction of the miniature are shown in
the photograph to the right. These tools include an X-acto set
including a miter box "A", a small blade cutting knife "B" and a box of
blades "C". A block of wood is placed in the miter box to protect the
saw blade. The X-acto saw, which came with the set, was useless for
hard wood and replaced with the saw "D". Also used was a small
hand drill set "E", a 12" scale "F", a set of files "G", a sanding
block "H", and a soldering iron "I". These tools are shown on a "self
healing" rubber
cutting pad which was indispensable. |
 |
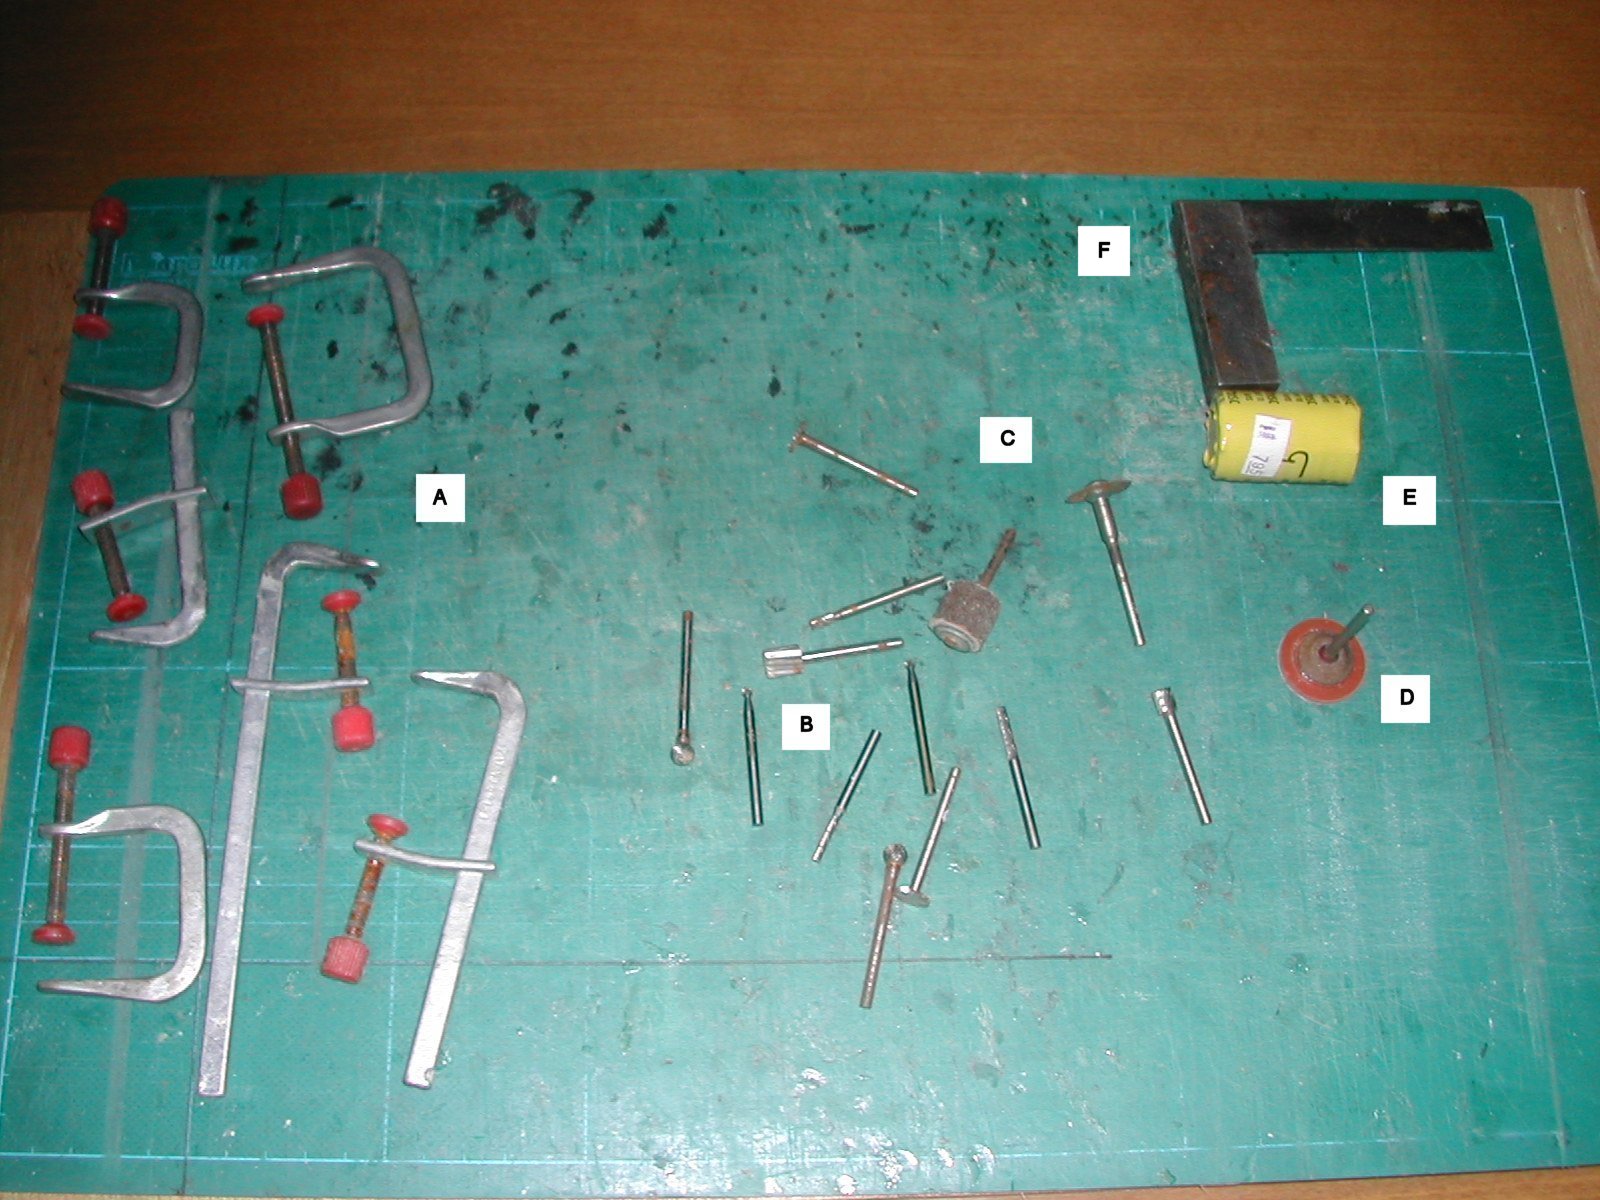
| Additional
small tools are shown in the photograph on the right. These
include a set of clamps "A" of which only a few are shown, a large
number of Dremmel cutting bits used for milling "B" and circular saw
blades used for cutting slots for the tongue and groove construction of
the interior doors and Indian shutters. A makeshift hand disc sander
"D"
was constructed by gluing a rubber disc to a stone cutting tool. Small
sanding discs "E" were then fastened to the rubber disc. The
whole unit could then be used as a hand held disc sander. It was very
useful for sanding small parts down to the exact tolerances
required for miniatures. Finally we have a square "F". |
 |
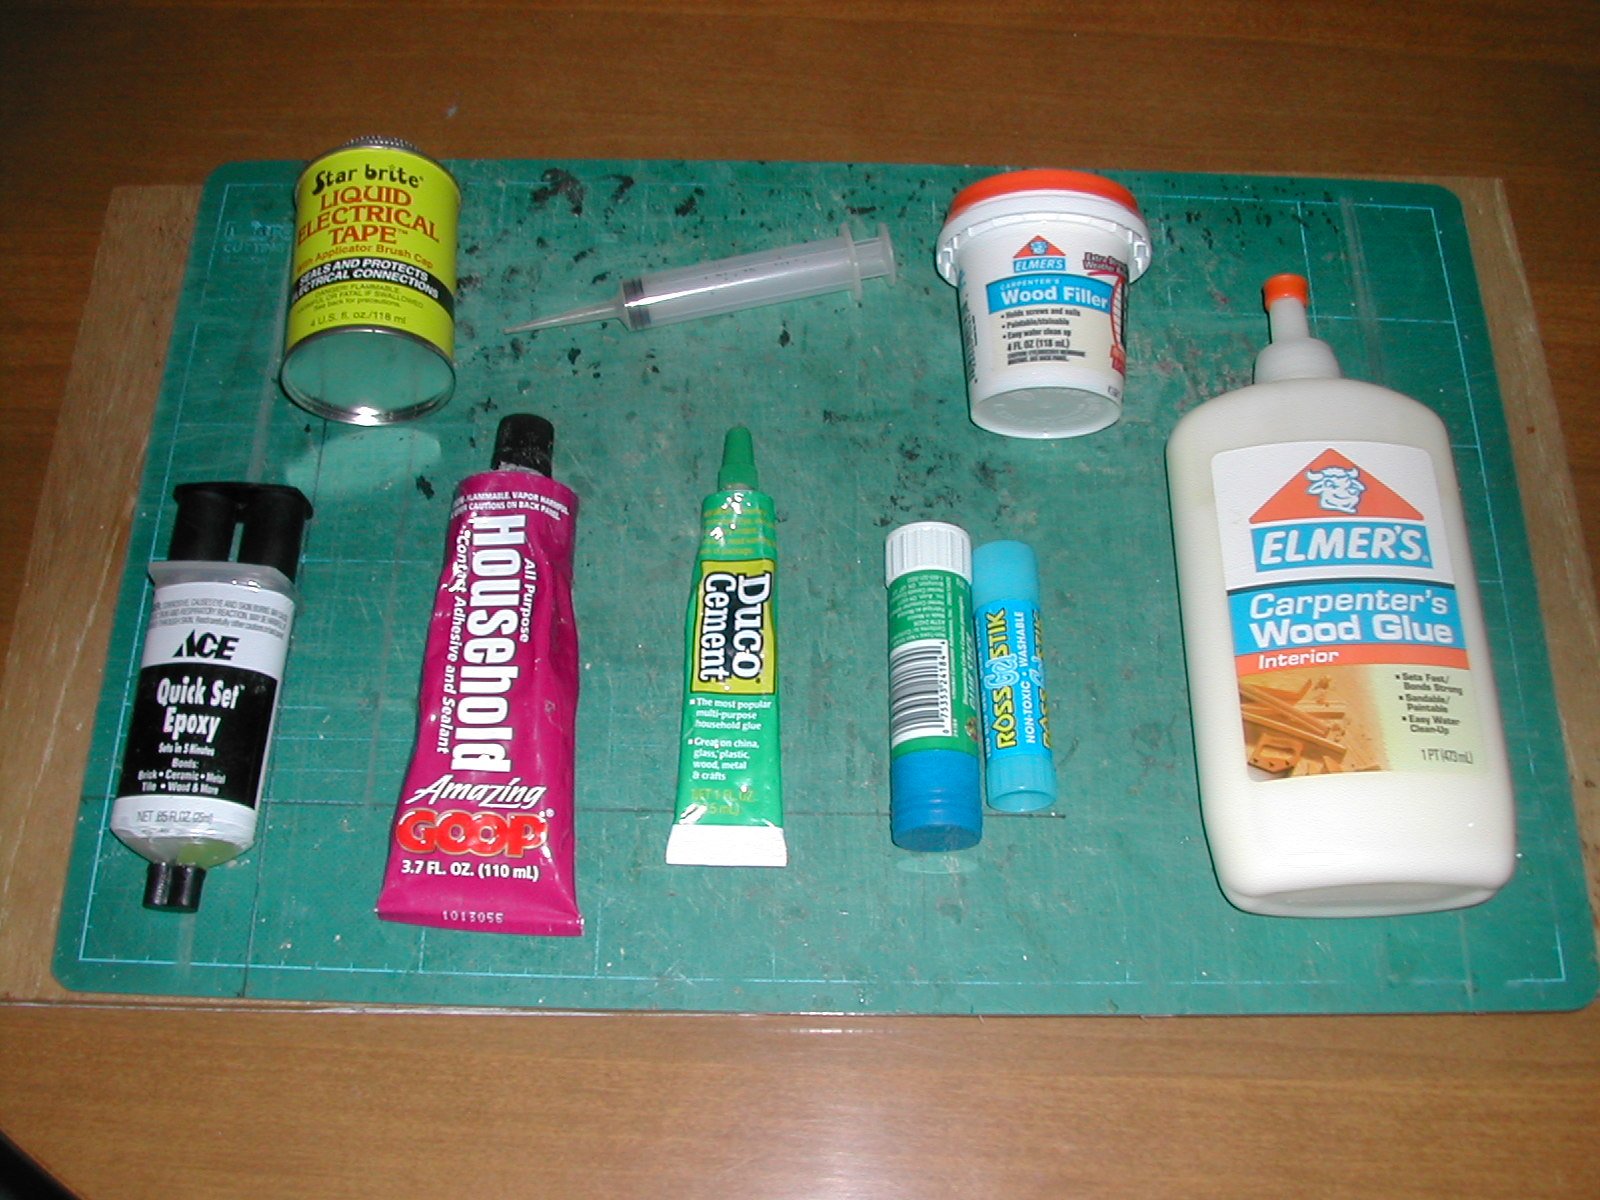
| The adhesives used in the construction of the miniature are shown in the photograph to the right. When gluing clean wood to clean wood such as the floor boards, ordinary Elmer's carpenter's glue was used. A small syringe was used for applying the adhesive. Elmer's Wood filler was used for touch up. When gluing dissimilar parts together such as metal hinges to wood, quick setting 5 minute clear epoxy was used. Both of these adhesives required clamping of parts until the glue had set. Household "Goop" was used for mounting the floor and crown moldings. This adhesive is tacky enough so that it needs no clamping until it sets. In some cases Duco cement was used, for example attaching the frames on the paintings. This is a quick setting glue and can be held in place with your fingers until it sets. Ordinary glue stick paste was used for mounting the wallpaper. Although not an adhesive, shown here is Star-brite liquid electrical tape used for insulating the electrical wires. This product is used extensively in boat building. |
 |
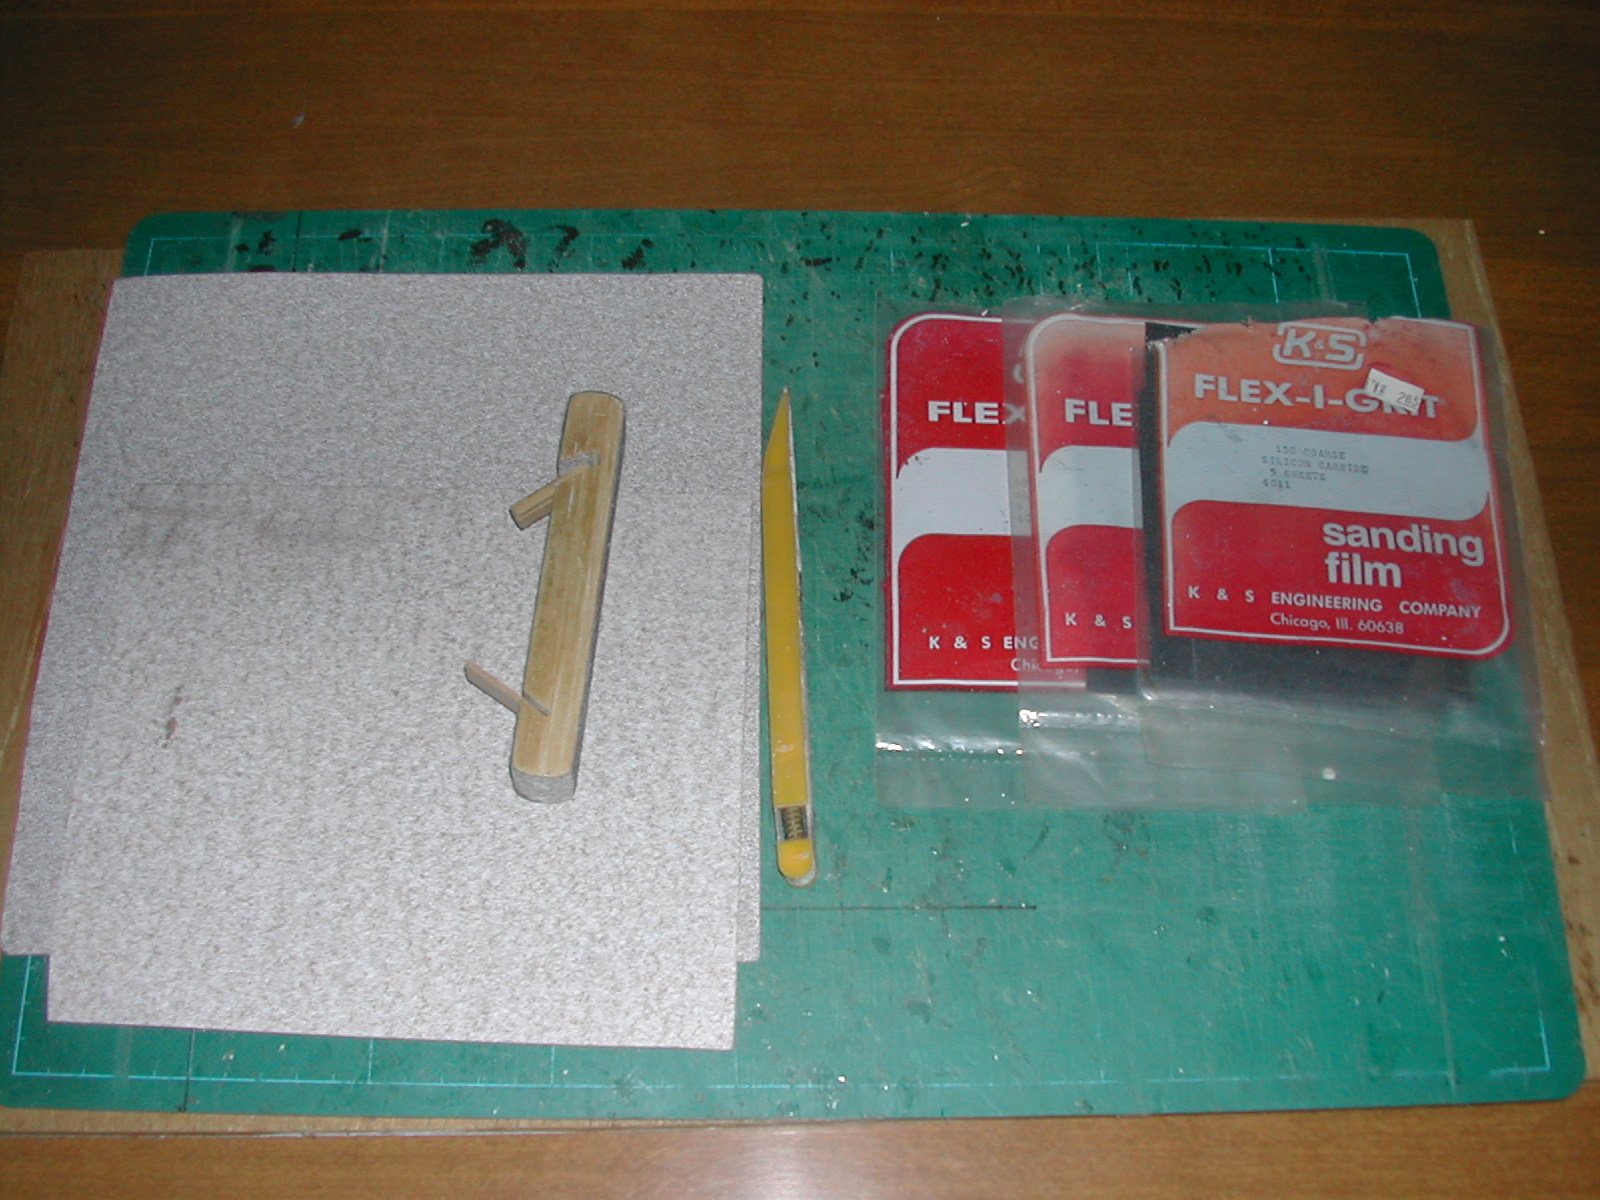
| The sandpaper used ranged in grade from 120 grit up to 400 grit. All wood surfaces prior to painting were sanded with at least 120 grit paper. Between applying coats of paint, finer grades of sandpaper was used to get a very fine finish. A sanding block is shown as well as a sanding stick for very small surfaces. One can mount a sanding belt of various grades on the spring mounted stick. |
 |